Karen Hanmer’s Five Essential Bookbinding Tools

Karen Hanmer

Bookbinder in solo practice, http://www.karenhanmer.com/

Only FIVE?!

Maybe that’s not so limiting after all. Two experiences have taught me that with tools it is true that less is more. First: observing time lost when someone is forever rummaging through their steamer trunk-sized toolbox. Second: over my career learning to work more efficiently. An important component of this has been finding several uses for whatever tool is in my hand rather than suspending work to reach for another.

These are the essential tasks I perform:

fold

sew

measure

mark

cut

apply

press

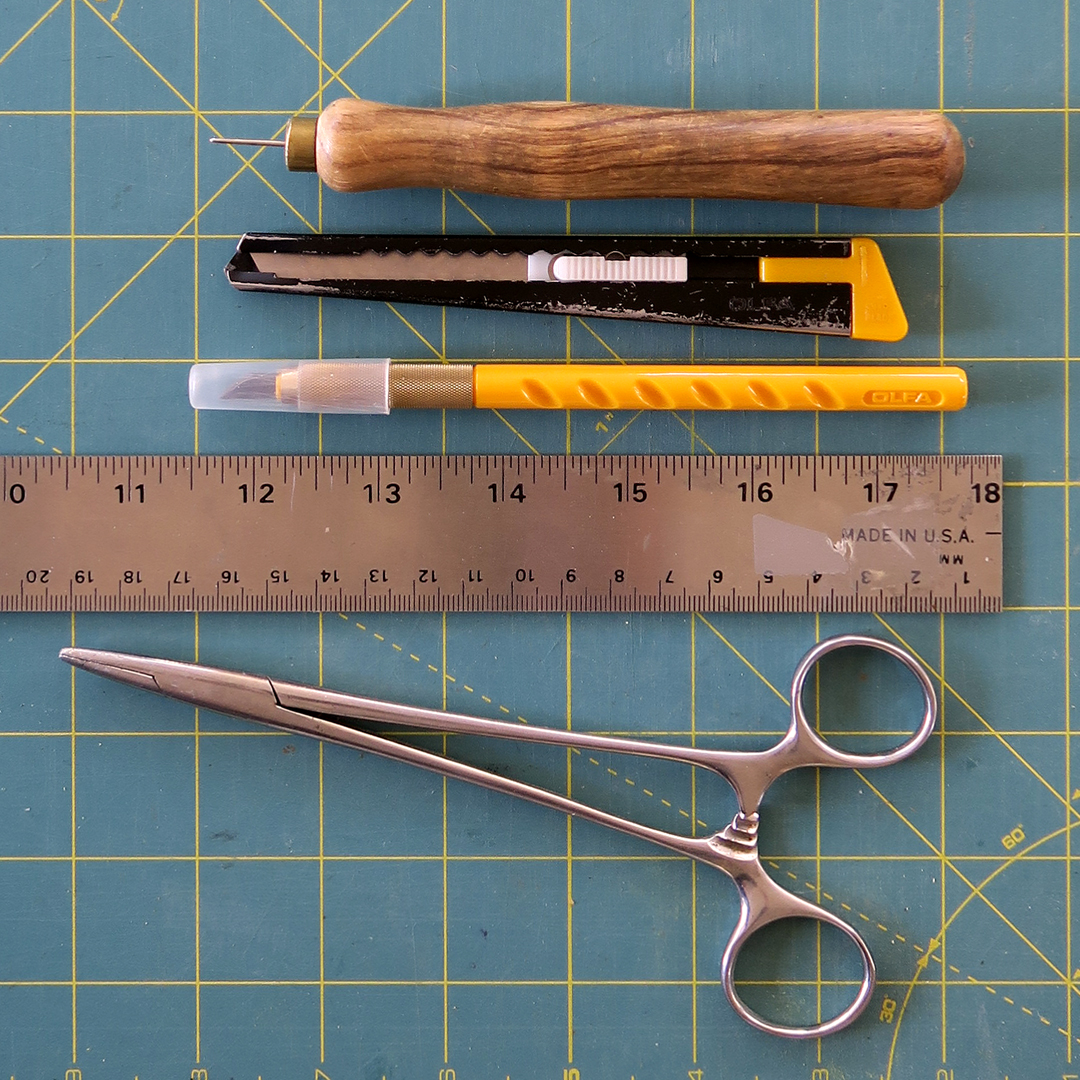
All of these tasks can be accomplished with a very modest toolkit made up of the following five items.

1. Folder. Bone for a sharp crease on paper, Teflon for surfaces that might become burnished. A Delrin Folder combines the best properties of both.

2. Needle. A #18 John James is strong enough to go through any paper text block and the eye is large enough to thread effortlessly with sizes up to 18/3, and with some persistence 12/3. I use the same size for sewing endbands.

A needle in a pin vise becomes an awl, which can also be used to score, scribe lines, mark measurements, clean tooling, and apply adhesive or color to precise areas. A pin vise is more versatile than an awl because it can be outfitted with any size needle, sharp or blunt. I favor this one over Jim’s because it is narrow, rolls up with other tools for travel.

3. Knife. If limited to one, I’ll take an ergonomic scalpel handle and outfit it with a #23 Havel’s blade.

4. Straight edge. Not cork-backed. To make them non-skid I’ve been saving the ½-inch that remains after cutting the finest grit micro finishing films to fit sharpening plates and adhering that to the back of all my straightedges. Too fine to scratch whatever I place the straightedge on, and adds almost no thickness to skew my cuts.

5. Brushes. A selection appropriate in size to the area of adhesive being applied.

I’m going to consider the final two items freebies since they can be scrounged up in any home or office:

Paper “rulers.” Narrow strips of unprinted waste paper used with a pencil tick or fold mark to transfer measurements from one material to another, functioning as no-cost dividers, and sometimes better because they can measure spine width and other non-flat surfaces. These can also be used to mask areas when applying adhesive and to mark the center of sections when sewing endbands. [Note: this is called comparative measuring]

Weights.

I’d supplement a larger kit with the following:
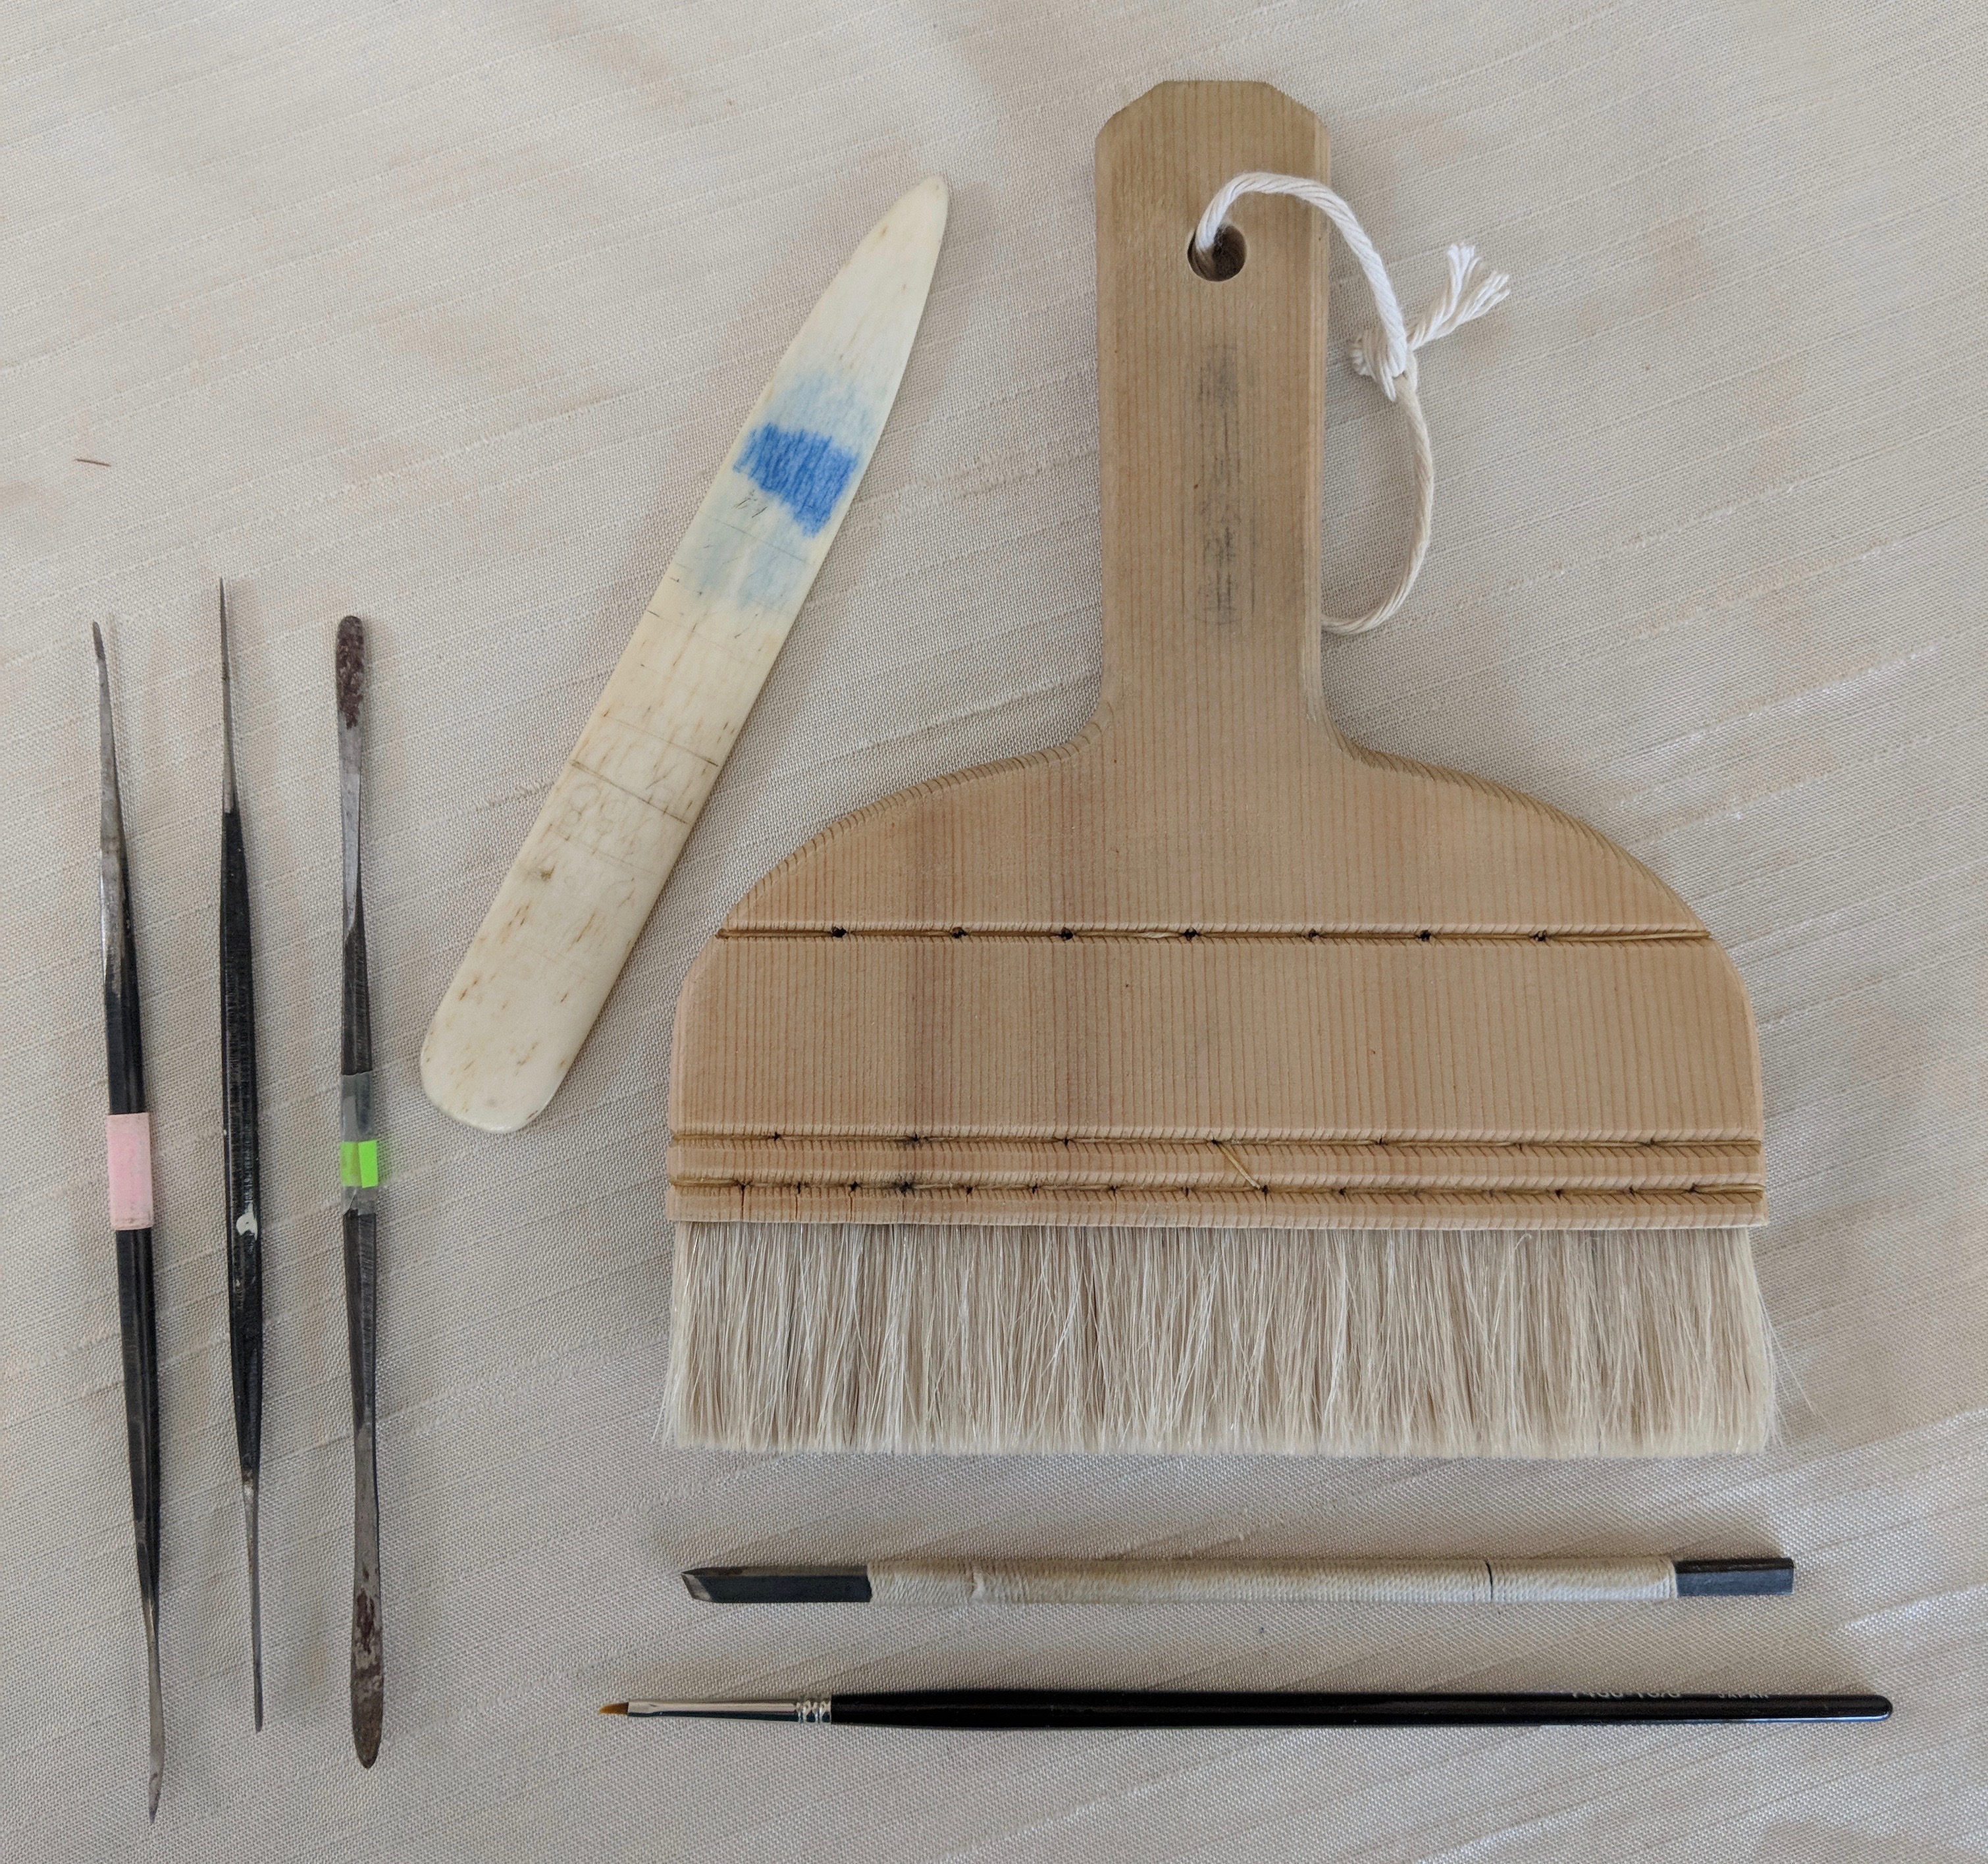
A microspatula.

Dividers.

A small rectangle of non skid shelf lining anchors a finishing press in place, keeps beginners’ work from sliding all over the bench when they are learning to case in, and an even smaller piece will help grip a needle for binders who are losing their dexterity.

A small brass triangle with a handle is easy to grip and position, can mark corners prior to covering, is a stable mini straight edge, and doubles as a light weight to aid in placement.

The variety of machinist square called a “footed square” ensures book blocks and boards are square, aids transfer of marks at the board edge to the point of lacing, and is another light-duty weight.

A thin, narrow folder is essential for forming headcaps and doubles as a short-handled microspatula.

An inexpensive English paring knife separate from the one I use to pare leather for utility cutting: back corners, pre shaping boards prior to sanding, and cutting off excess cords and leather “pegs” on historical bindings.

Cathryn Miller’s Five Essential Tools for a Book Artist

Top to Bottom: a custom scribing tool, well used Olfa Model 5001, Olfa swivel cutter with scalpel blade, ruler, and hemostat

Cathryn Miller

Book Artist. Byopia Press, Blog, Instagram

In my practice I create artist’s books and content-sensitive altered book works. I rarely use the sewn codex as a format, so I did not include an awl —I have three lovely ones in different sizes made for me by my partner David— or a needle. My two most used tools in any project are a home-made scoring/scribing tool and an Olfa snap-off-blade knife. I also use a scalpel when cutting, especially curves. The eighteen inch steel rule is absolutely essential. The surgical forceps would not have made my list under normal circumstances, but I discovered that they were the only tool I own that would enable me to assemble my most recent artist’s book.

The tools I would miss most:

Bone folders (four at this point)
Glue brushes (though I have been known to use my fingers)
Swivel knife and Circle Tool
Set of graduated width steel rules
Kutrimmer 1080


Elissa O’Loughlin’s Five Essential Tools for Paper Conservation

Elissa’s five essential tools for paper conservation. Center: Noribake paste brush. Left: Caselli #11 microspatula and bone folder. Bottom: 000 sable brush and a string wrapped Japanese chop carving knife.

Elissa O’Loughlin

Paper Conservator and Wren Haven Tools

Most paper conservators identify with all things Japanese. This is because we use so many Japanese-made materials and methods in our work. If there was a universal symbol for paper conservators, it would be the noribake or paste brush. This traditional tool is used in conservation for application of paste to linings and for making prepared repair tissues. It has goat hair bristles and is made of Japanese cedar, cherry bark, and cord. The care of these brushes is time consuming—long, careful washing and rinsing plus special drying technique—bristles hanging downwards! The brushes cost between $150 and $300. They are made by craftsmen in Kyoto and in Tokyo. Each city has its own style of handle. Kyoto has a rounded shoulder, but Tokyo’s is angled. Leave it to the Japanese to have different styles! I have had mine for 38 years.

The second tool is a very thin and narrow carbon steel microspatula. Made by Caselli, located in Milan. It is the number 11 Minarette – but don’t go looking for one because they are not made anymore. A colleague in Milan visited the shop only to discover that the one ancient venerable craftsman who was skilled enough to make them had retired. Their larger spatulas are still available and can be worked down to your requirements. Many sad instances of dropped Casellis have resulted in bends or breaks—Not to worry! The steel is wonderful and easily re-worked on a stone or slow rpm grinding wheel. Just don’t get the steel too hot! The picture shows several reworked versions.

Number three must be the bone folder I first got in 1983. It has no special characteristics except for the fact that I scratched the new year into it every year for ten years. Don’t know why I stopped! You probably can’t see the numbers in the picture, but rest assured the blue color was an unfortunate accident … poor old thing!

The fourth tool is a triple-zero Windsor and Newton Series 7 Kolinsky sable brush. No paper conservator can work without this trusty brush used for solubility testing. They are a miracle of craftsmanship!

The fifth tool is a Japanese chop-carving knife. This little knife is made from rectangular stock and is worked down to a puffy blunt-angled edge. It is used to thin paper and to delaminate Japanese papers for mending and filling losses and tears. The handle is wrapped in silk. They are hard to find any more.

I have always been particularly protective of my tools, but I won’t hesitate to put one into your hands for you to learn by. This surprises many students – but how else can the tool and its potentials be felt? Luckily, as a conservator, the students I’ve taught are overwhelmingly respectful and careful.

Woe be to the abuser of tools!