Layered Adhesives: How to Reduce PVA Use by 80% on Paper-backed Bookcloth

Fig. 1. The adhesives used in this post. Left: Aytex P wheat starch paste. Middle: Jade 403N PVA. Right: Lascaux 498HV. A simpler variant just uses paste and PVA.

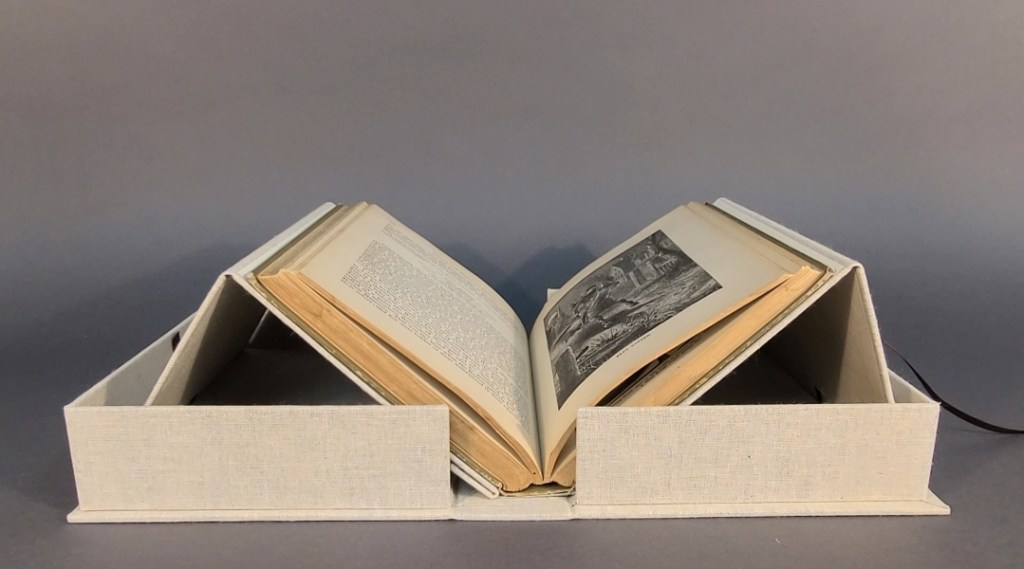
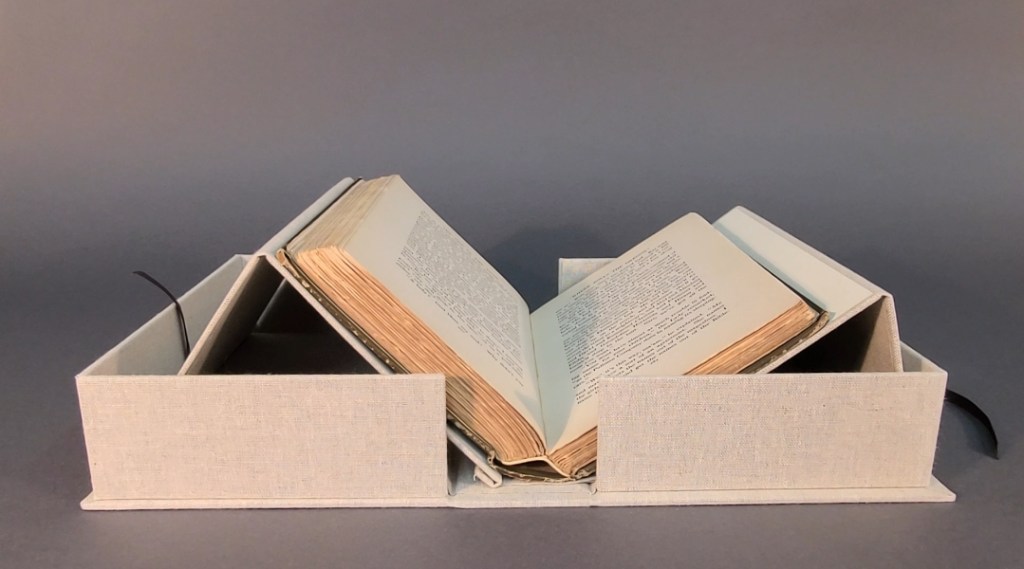
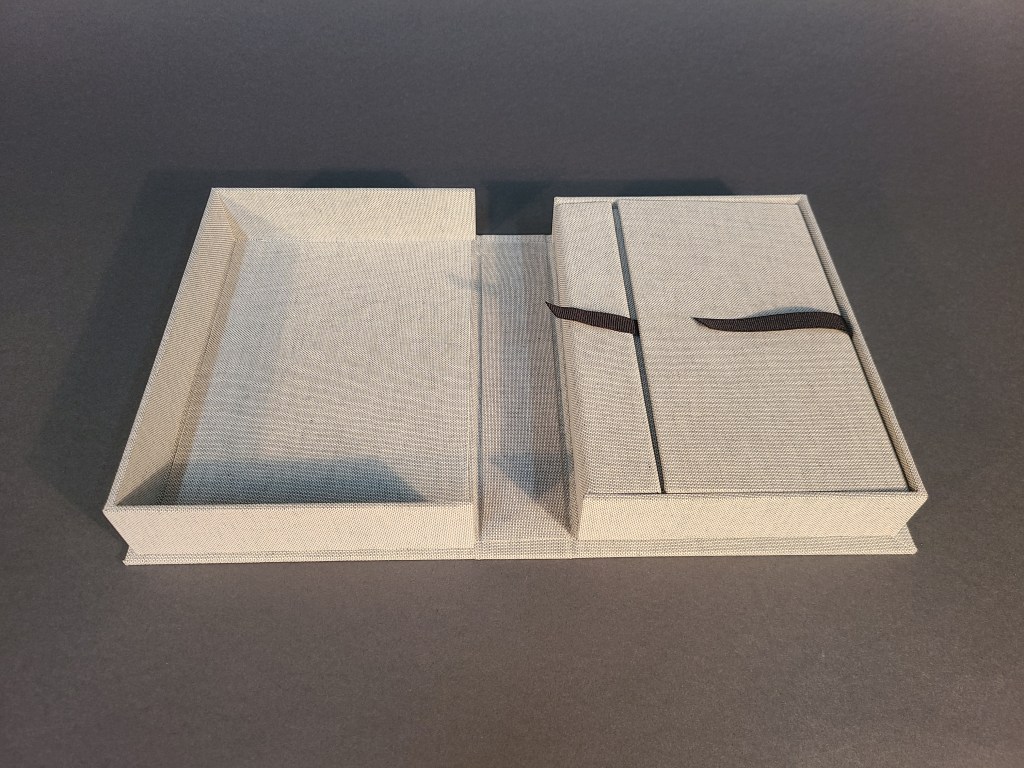
PVA (PVAc, Polyvinyl Acetate) is the adhesive most commonly used in book conservation to make cloth covered drop-spine boxes. Most of my clients prefer these to other types of boxes. For large and heavy books there are few other options.

While PVA is convenient and sometimes necessary for boxmaking, offgassing is a concern. The Library of Congress ( LC poster) found PVA is still offgassing after 6 years! Apart from potential damage to objects, it’s a plastic; most of us are trying to use as little as possible. The offgassing from PVA will not cause instant flaming death for books, it’s not ideal for longterm storage. Books with copper alloy bosses and clasps are especially vulnerable. Box structures like a cradle box, which have many layers of cloth–adhesive–board are most likely offgassing much more than a standard box. The Library of Congress study found that even a box made with 90% paste and 10% PVA still offgasses enough to fail the Oddy test. However, the concentration was much less than straight PVA. As I understand it, testing is ongoing, including other of adhesives like EVA.

There is not a single convenient and cost-effective substitute for PVA. What to do?

Fig. 2. Thick Aytex P wheat starch paste. For this purpose, straining is not necessary, the lumps get smoothed out on when pasting out. Or you can use your fingers. This is the way bookbinders traditionally used flour paste. Paper conservators, please don’t freak out.

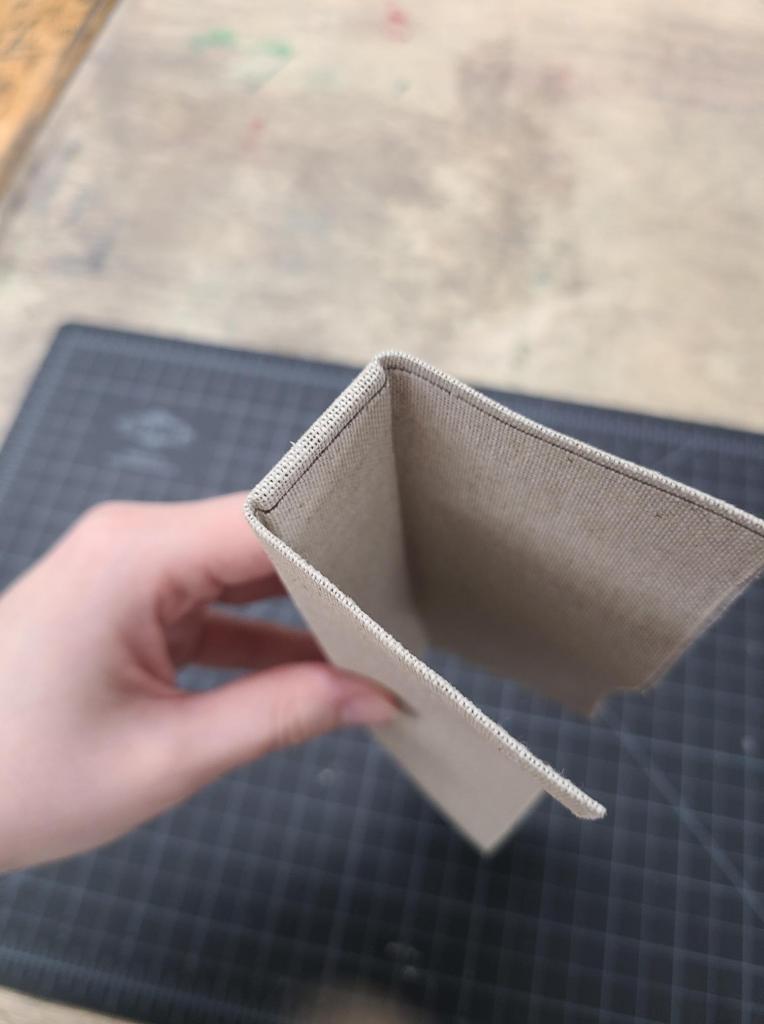
Paste is difficult to work on paper backed bookcloth because of the slowness of drying, problems with adhering edges and turn-ins, bubbling during drying, unpredictable stretching, and weak cloth-to-cloth bonds. An example of cloth-to-cloth bonds are when the trays are attached to the case of a drop spine box, so two outsides of the cloth need to stick together. Lascaux 498HV (an acrylic) is expensive, dries quickly, but also forms a fairly weak exterior face cloth-to-cloth bond. PVA is, well, PVA. I’ve heard of several different approaches, sometimes involving methyl cellulose, but they all pre-mix the adhesives together. 

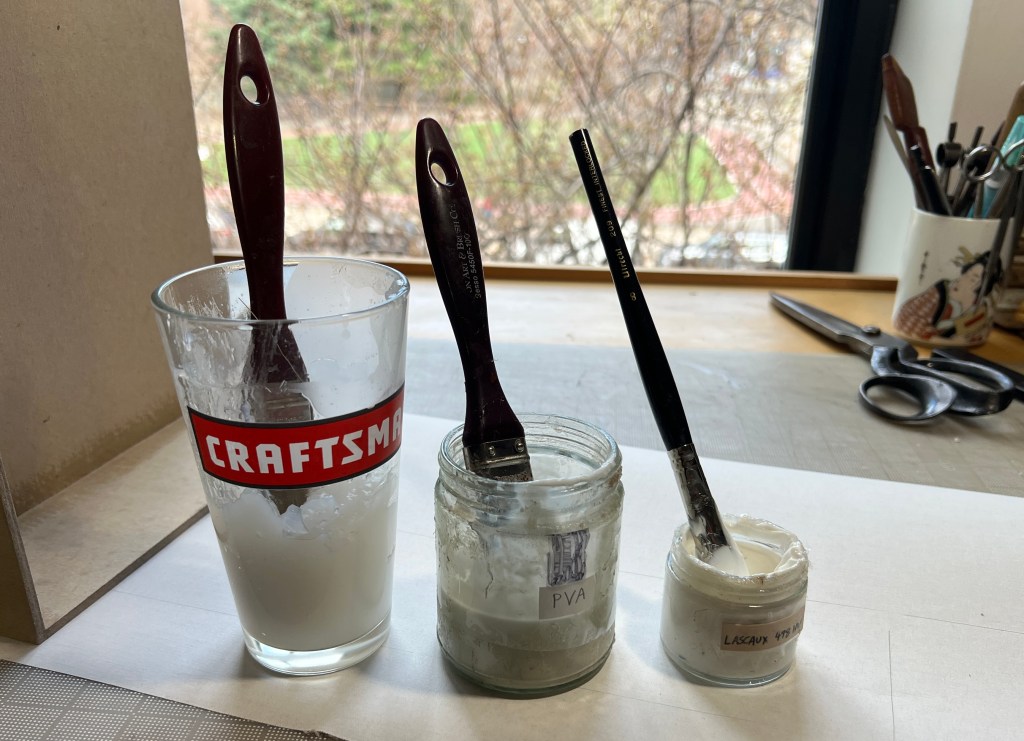
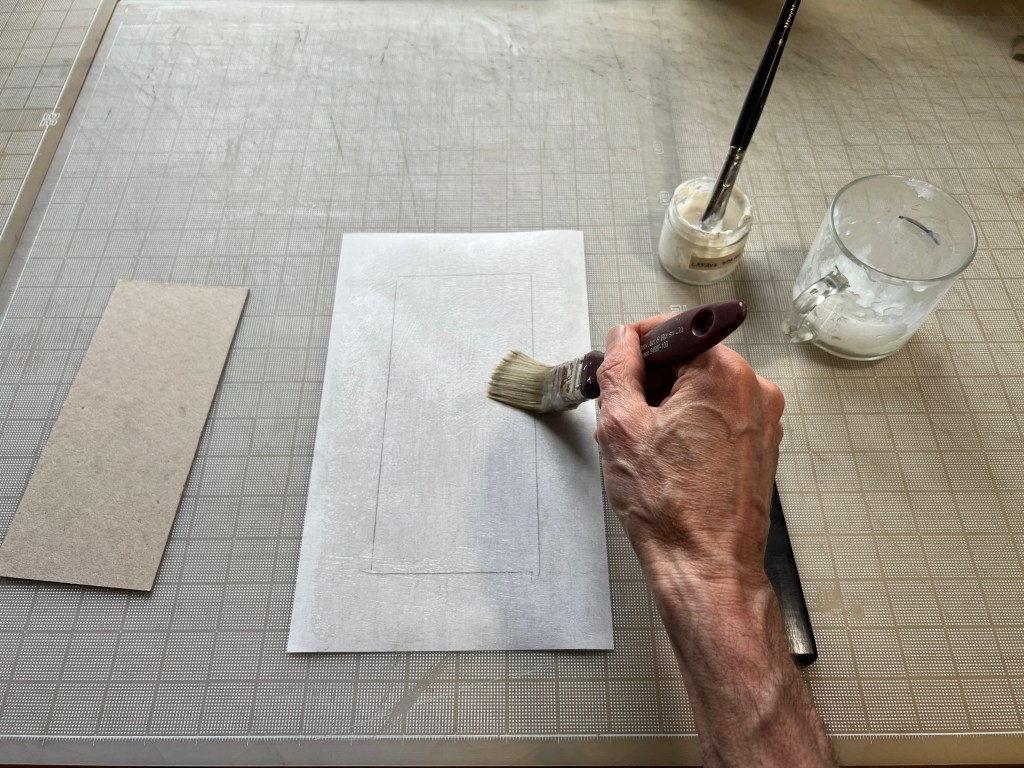
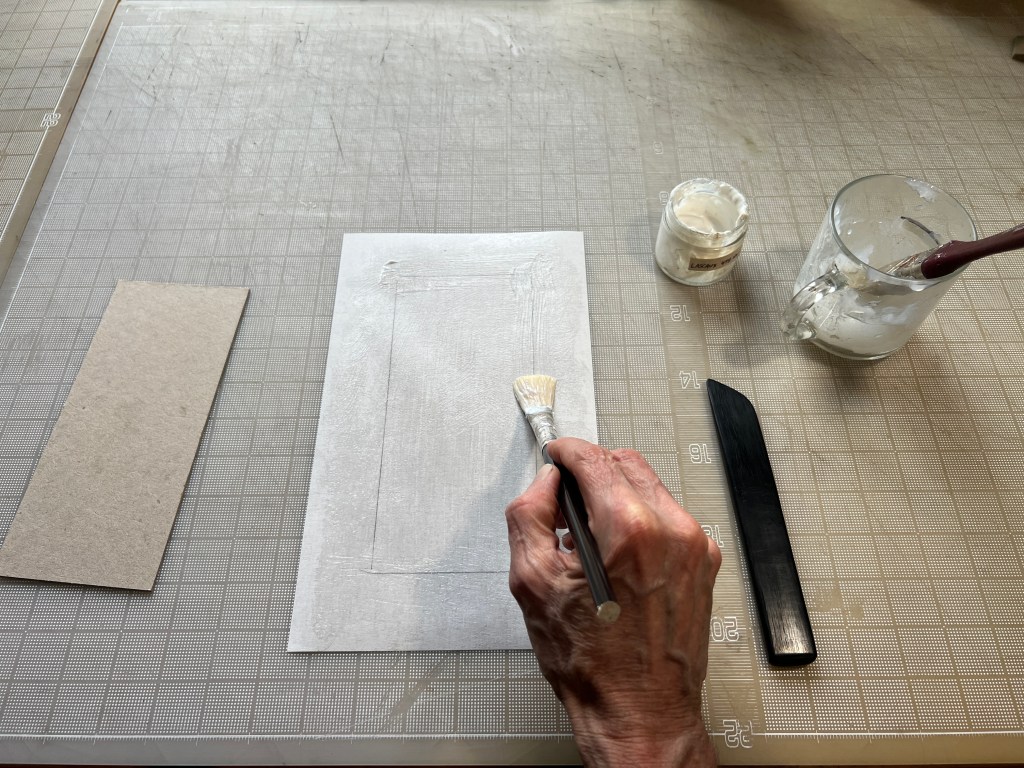
In my Layered Adhesive technique, different brushes are used for each layer directly on the cloth instead of mixing adhesives together before application. It sounds a little like amateur hour — I know — but allow me to explain. Each layer of adhesive performs a different function. I’ve been using this technique on all my boxes since 2023.

PVA use is reduced by about 80%. Paste provides most of the adhesion, small amounts of Lascaux add extra tack to prevent unadhered areas at turnins, corners and board edges. I’ve found PVA is still necessary when attaching the walls to the base of the trays, and when attaching the cloth covered trays to the case. I’ve only used this technique with Halflinnen cloth because I use it all the time. I imagine other paper backed cloths would be suitable, possibly with some modification.

A simpler variation just uses paste and PVA, instead of Lascaux in some areas. Even this cuts down on PVA consumption considerably.

THE TECHNIQUE 

Fig. 3. Coating the Halflinnen cloth with paste. Note the thick paste. A tiny jar of Lascaux 498HV uses a  separate container and brush.
Fig. 4. Adding a layer of  Lascaux on the edges of the board. The paste thins the Lascaux and adds more open drying time. The Lascaux greatly helps adhesion when turning in, preventing bubbles, etc… Stretching the cloth is still a problem, so it needs to be handled carefully.

OVERVIEW OF THE LAYERED ADHESIVE TECHNIQUE

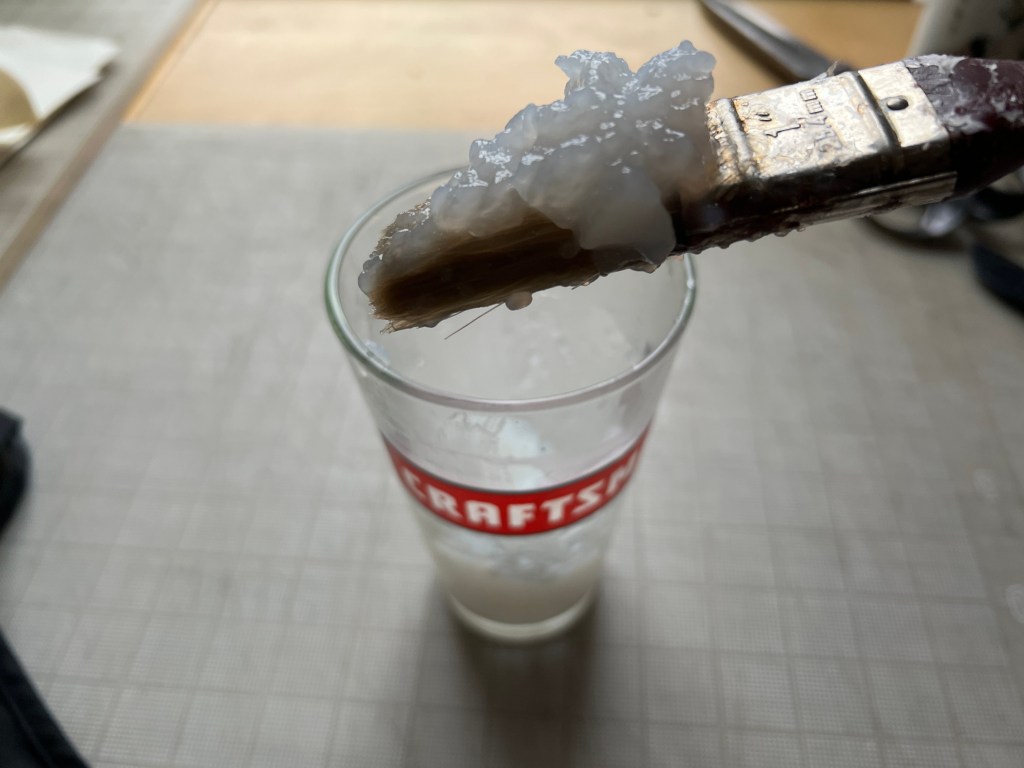
  • Paste, Lascaux, and PVA all use separate brushes and are kept in separate containers.
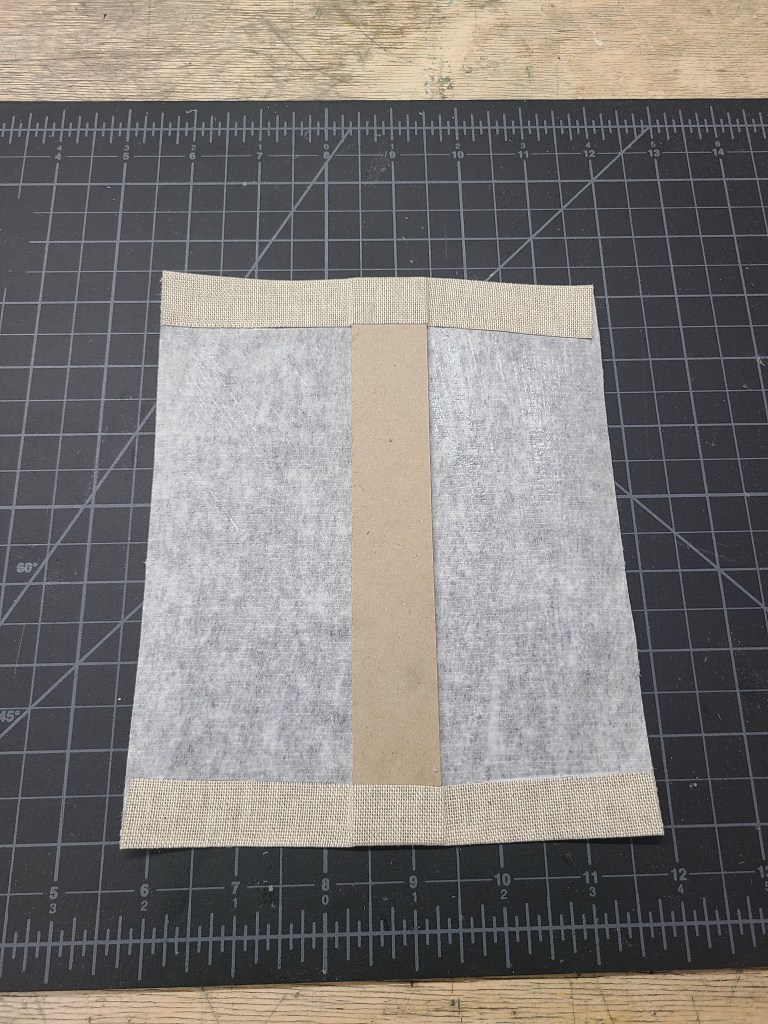
  • Paper to board, and board to board adhesion uses thick (6g starch per 100ml water) wheat starch paste
  • Corners and board edges get a thin coat of Lascaux 498HV on top of the paste. This makes them easier to adhere than paste alone, and I find there are less problems with delamination or bubbling during drying. The Lascaux gets diluted when applied on top of the paste.
  • If making a 3 piece case, for example, use paste then put a little Lascaux 498HV on the head, tail and foreedge turn-in areas. Similarly, when casing-in, use paste then add a strip of Lascaux 498HV on the edges of the pastedown, where it overlaps the cloth turn-ins on the case.
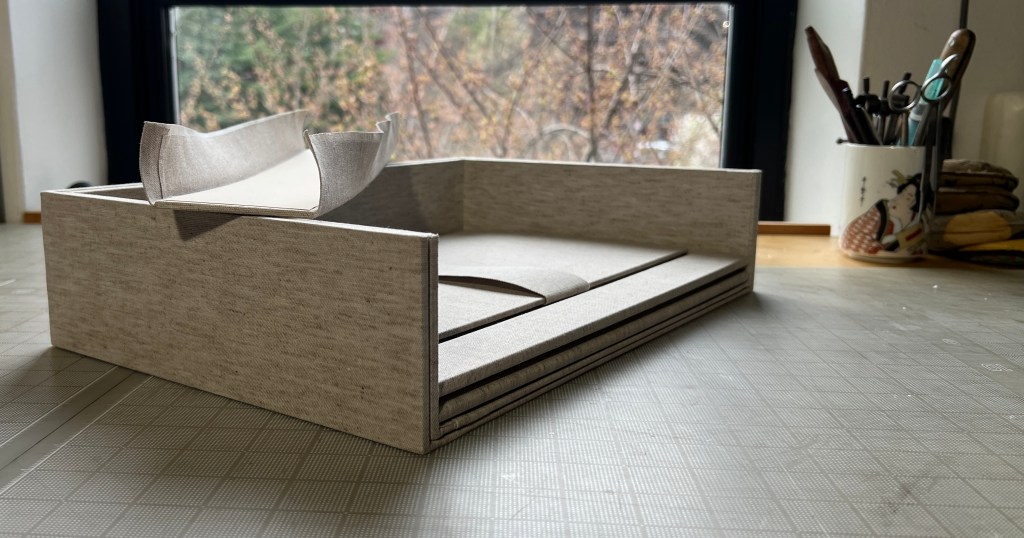
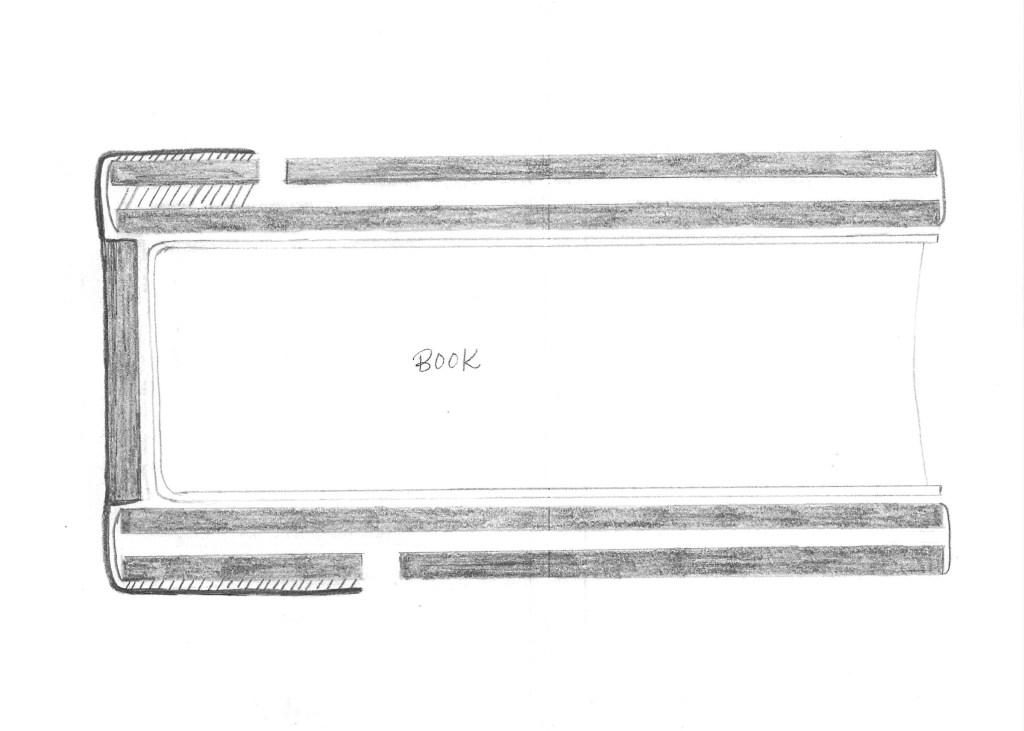
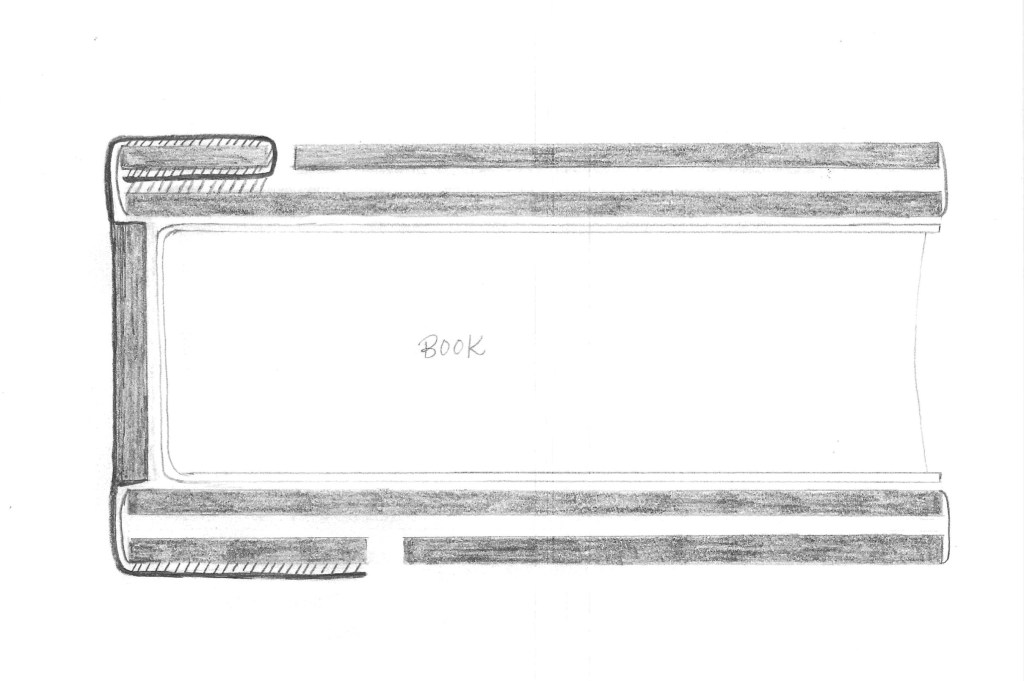
  • When making drop-spine box trays, I find the strength of PVA necessary to attach the walls to the base.
  • When attaching the cloth-covered trays to the case, use paste, with a coat of PVA on top, at the edges, again at the exterior cloth-to-cloth attachments.

ADVANTAGES 

  • Paste is cheaper than PVA
  • Paste is better for the environment
  • Less PVA equals less offgassing
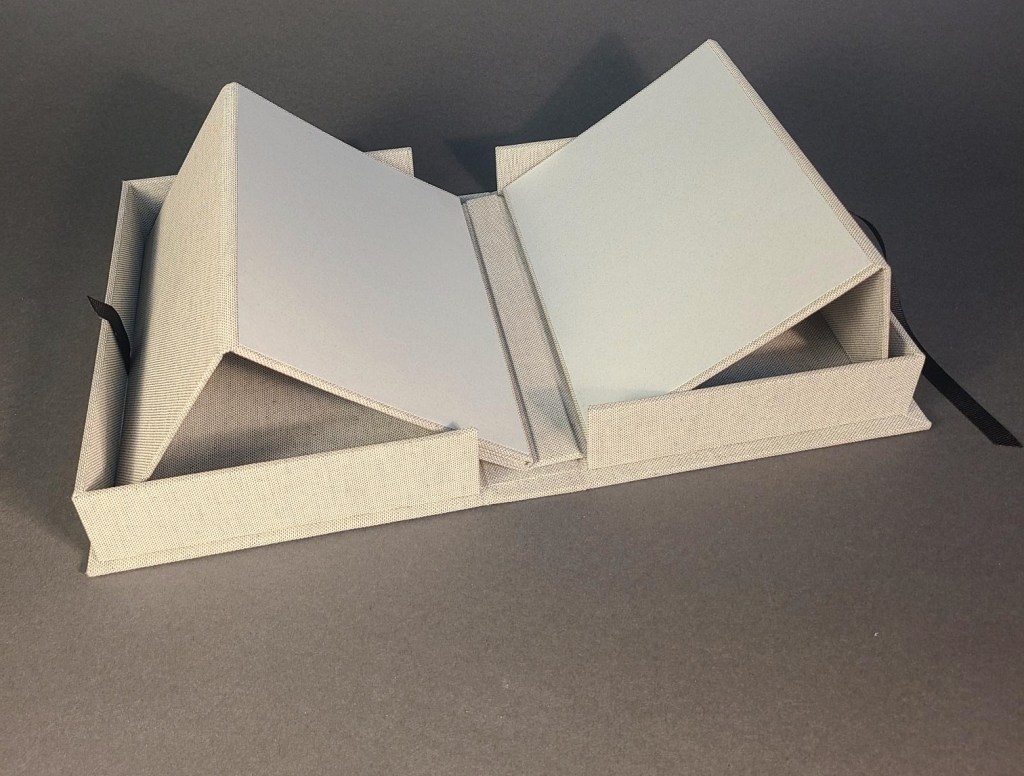
  • Paste stiffenens the cloth/board much more than PVA; I like the feel. It is also perfect for stiffening the wedges in a cradle box
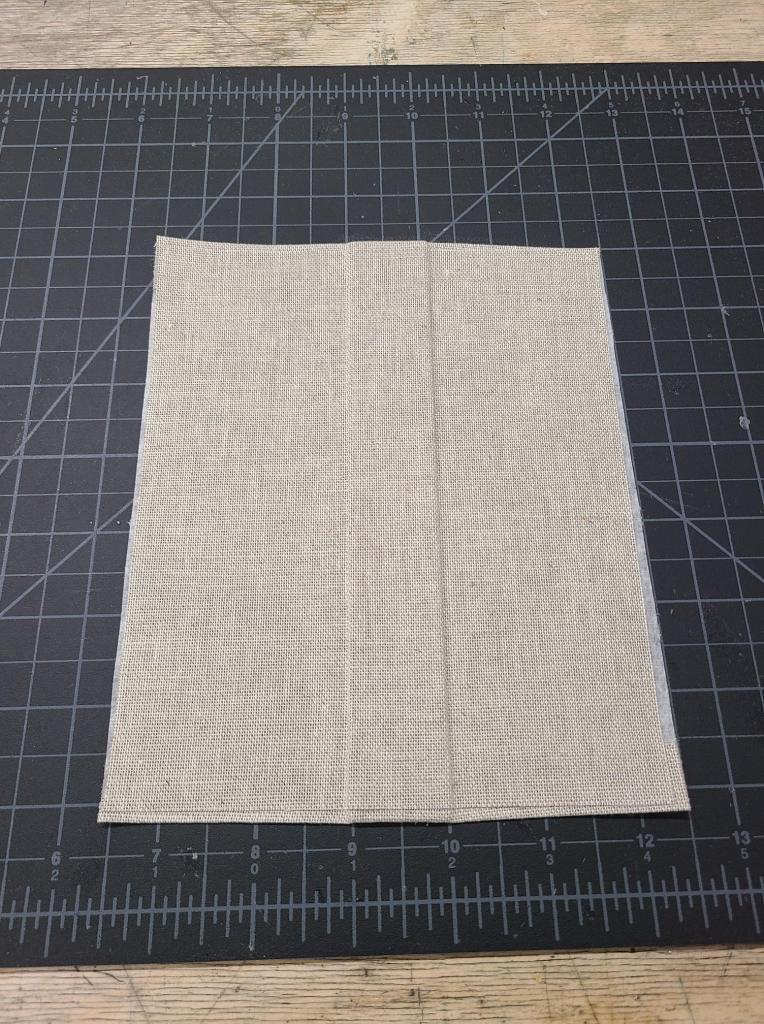
  • The cloth is easier to smoosh together at joins and blends nicer
  • Paste flattens the fibers on the cloth so it feels smoother
  • Paste works wonderfully for adhering double walls together; a little slip then bam they stick
  • There is less waste than premixing paste with other adhesives
  • Paste has a long open working time
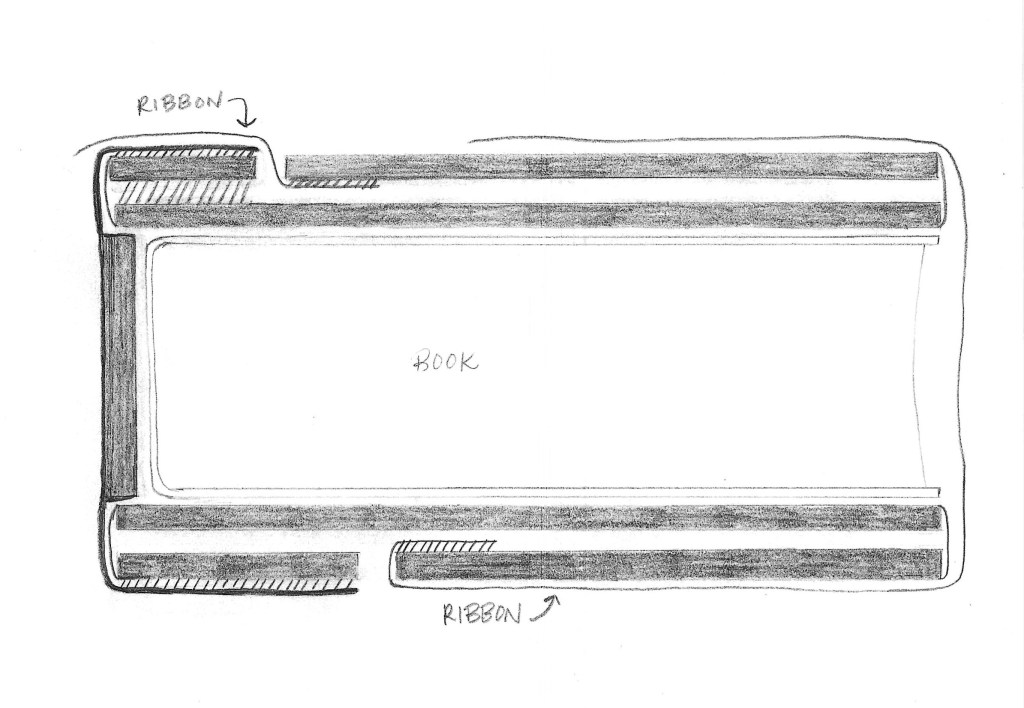
  • Ideal for cradle boxes with many cloth/adhesive layers

DISADVANTAGES

  • Paste has a long open working time
  • Uses more brushes, longer cleanup
  • There is a small learning curve, and it takes more time when working compared to PVA. Then again, if you are charging by the hour….
  • May not work for other bookcloths without modification
  • Cross contamination with paste of other adhesives, need to use up in a few days
  • This technique is likely more suited to making a one-off boxes, rather than production

SUPPLY SOURCES

Halflinnen paper backed book cloth. Colophon Book Arts Supply: https://www.colophonbookarts.com/paperboard/rohhalbleinen With commendable transparency the manufacturer provided information on the paper-to-cloth adhesive, which is a PVA (!) specifically Brand VA518 from Intercol (https://www.intercol.info/pva-glue/) Warning: This PVA can be reversed with an errant blob of paste left to soak in. Just saying. 

Jade 403N PVA. Conservation Resources. https://www.conservationresources.com/shop/jade-403n-adhesive/

Lascaux 498HV. New York Pigment Company. Recently formed by former employees of Kremer Pigments, which has closed. They are Kremer’s NY distributer. https://www.newyorkpigmentco.com/products/lascaux%C2%AE-acrylic-glue-498-hv

Aytex P Wheat Starch Paste. Polistini. https://polistini.com/products/wheat-starch-aytex-p

FURTHER RESEARCH

This isn’t perfect, but using less PVA is better than using more, right? I’m curious if others have found different workable techniques to cut down on PVA when used on bookcloth? Have you been able to eliminate it completely?

Fig. 5. An in-process cradle box, using the layered adhesive method. I just need to make the case and glue everything together. The flat spinepiece is an improvement from Annie Ujifusa, the wedge pull mounting (at the bottom) is Mitchel Gundrum’s idea, and I’ve started making these 5cm wide bookcloth pulls for ease of opening. Laminated with PVA of course!

A Clamshell Box with an Integral Flat Back Cradle. By Annie Ujifusa

Annie’s completed box open, ready to display and protect a book during handling.

Annie Ujifusa, who developed this variant of a cradle box, guest blogs about her process and details the construction. I came up with the one-piece cradle box in 2009.

During a book conservation internship at the Boston Public Library (BPL) last summer, I was shown a beautiful medieval manuscript from the rare books vault that was housed in a clamshell box with a delightful built-in cradle. This enabled the book to be safely opened and read without even having to take it out of the box. I was charmed by the idea and when I asked how I could make one, I was pointed in the direction of Jeff Peachey’s blog, and then I went down a rabbit hole into making and experimenting with it. I started modifying small elements until I eventually ended up with a structure that I think serves a specific, useful purpose. I recommend reading his blog first to understand his terminology that I have adopted here. 

The original construction from Peachey calls for two pieces of bookcloth glued back-to-back serving as the hinge connecting the two wedges of the cradle. I made two boxes this way, and I really loved how, when closed, this limp hinge is able to wrap perfectly around the curve of the spine of the book. But I wanted to keep playing around. For my third attempt I got to thinking about what changes could benefit the structure. I wanted the hinge to have a more finished look; I decided to add a piece of binder’s board to it, making it stiff, so that the cradle looked like a complete, cohesive structure — almost like a book itself — instead of two wedges connected. A structure I was shown by Mary Hamilton French, the Conservation Officer at the BPL, came to mind as the perfect inspiration: the post binding. I took the spine from this binding and adapted it to this purpose.

Figs 1. A: The spine piece exterior covered. B: The inside. C: .

Its construction is simple. To make it, cut the binder’s board to match the thickness and height of the book. Cut two pieces of cloth—one should have a height that allows for turn-ins around the head and tail of the board, and the other should have a height that is just a few millimeters shorter than the board. The width should be oversized for now, allowing enough to cover the spacer boards on each wedge, and then some. Glue out the taller of the two pieces of cloth and lay the board down in the center. Turn in the cloth at the head and the tail, and crease it against the sides of the board, keeping the turn-in folds as perpendicular to the board as possible. (Fig. 1A) Then glue out the other piece of cloth, lay it onto the board, then crease it against the sides and then across the expanse of the other piece of cloth (Fig. 1B) Fold both layers of cloth in, against the board edges (Fig. 1C).

Then trim off the excess cloth. With fixtures holding the book and the folded-up wedges in place, glue one side of the hinge to the inner spacer, and then the other side to the outer spacer. If you’re using cloth that cuts nicely, without frayed edges, you can simply cut and glue the cloth down right up to the edge of the outer spacer. (Fig. 2A) Otherwise, before adhering the spacer to the platform, leave enough cloth to wrap around the spacer and glue it to the underside for a nice, seamless look as seen in Fig 2B below..

Left: Fig. 2A. A cut spine wrapper. Right: Fig 2B. At the top, the cloth is wrapped around for a more finished look.

There were a couple of other minor adjustments I made. The gap between the spacer and upright was suggested to be one centimeter. I ended up reducing that to 5mm, for no other reason than I felt it simply looked more elegant. I also found that adding about one spine thickness to the height of the outer upright, as suggested, caused the wedge angle to be too steep. Instead, adding only about one third to one half of the width of the spine created an angle that more closely matched that of the other wedge. (Figs. 3A and 3B)

Figs. 3A and 3B. The left image has about a third the width of the spine added for even wedge height.

I then added the pull ribbons to a different spot as seen in Fig. 4. I adhered them to the back of the upright pieces before covering the back of the wedges in cloth. The outer wedge ribbon needs to be long enough so that it falls over the wall of the outer tray when opened, and the inner wedge ribbon needs to be long enough to span the width of the upright, the wall height of the inner tray and about two thirds of the width. I felt this saved time, while still allowing the opening to be effortless with a minimal learning curve.

Fig. 4. Ribbon placement for ease of opening the cradle.

Since this was just a model, I made it for a small, skinny book (Fig. 5). At the time, I didn’t realize it’s most valuable use and greatest potential; I think it would really shine in the case of large, flat-backed books that need the added support. It’s an overall neater look in the box, and it feels sturdier when opening. It also avoids potential abrasion from the edge of the inner tray where the spine in the limp hinge would have rested on.

Fig. 5. Completed box closed.

As Peachey laid out in his blog, this type of box requires very specific needs, and has some obvious drawbacks. This one I created calls for even more specific needs, but I think that’s one of the joys of conservation. Each book and each treatment is different and has its own set of obstacles. In addition to providing protection during storage and use, this box is a sure crowd pleaser and fun to open. It was an immensely satisfying structure to make, and I’m looking forward to making more in the future!

Annie Ujifusa Bio I’m currently a second-year student in North Bennet Street School’s (NBSS) Bookbinding program. Originally from Washington state, I moved to Boston from Alabama. During my first year at NBSS, I quickly became enamored with conservation. It’s truly magical to me. I will be starting as the newest Conservation Technician in the Conservation Lab in Special Collections at the Boston Public Library after I graduate. I believe the book is an object that should be engaged with, and I can’t wait to repair and stabilize books every day so they can be safely handled and studied for generations to come. In my spare time, I hope to continue making new bindings, as well as slowly mastering the art of gold tooling, which I have become obsessed with. I’ll be trying to build my hand tool collection for the rest of my life! Instagram: @annieuji

Thanks for the great idea and post, Annie! Some other cradle boxes from around the web are here. The AIC wiki is also useful for more information.

Fish gelatin: Spreading the word about a book conservator’s new friend

Written by Ashleigh Ferguson Schieszer, Special Collections Conservator and Co-Lab Manager of the Preservation Lab of the University of Cincinnati. Reblogged with permission. Originally published 27 November 2023.

Last year around this time, the lab was fortunate to bring in book conservator and toolmaker, Jeff Peachey for a week-long intensive workshop to learn leather rebacking. While I always expect to walk away with new anticipated skills as advertised by the workshop, I’m ALSO always pleasantly surprised by the tangential tips and tricks shared along the way.  In the case of Peachey’s workshop, there were many!

One of my favorites was his use of a fish gelatin. While adhering spine linings to our text blocks, Peachey pulled out a small baggie of fish gelatin he brought with him to the workshop.  He poured the dry flaky powder into a small jar, added room temperature cold water, and mixed it until a liquid-y consistency.  He then added strained wheat starch paste to the gelatin and mixed with water until he was happy with the consistency.  He estimated it was a 40:60 ratio of gelatin to paste. 

Jeff Peachey taught a workshop at the Preservation Lab in Oct. 2022 where he first introduced us to a low-bloom fish gelatin for book conservation that didn’t require heat for use.

If you’ve ever used gelatin before, you might be wondering – how is it possible to mix the gelatin without heating?  That’s the beauty of this product – it has a high molecular weight with low bloom strength and is produced from cold water fish which gives it this ability.  It might not be the strongest of the films with a 0-bloom strength, but for a book conservator doing paper repairs that need to be reversible yet strong, this combo still had an amazing tack when dry!

Peachey explained he first heard about the gelatin on a lab tour at the Weissman Center. He recalled Alan Puglia might have been the one who originally investigated the adhesive for pigment consolidation of hundreds of manuscripts for a show. The mention of a high molecular weight Norland fish gelatin was shared during a talk given at the American Institute for Conservation’s 44th annual meeting.  The talk was titled, The Challenge of Scale: Treatment of 160 Illuminated Manuscripts for Exhibition,” by Debora D. Mayer and Alan Puglia.

Peachey also doesn’t take credit for mixing the gelatin with wheat starch paste. He notes that even in Dudin’s 18th century manual, it discusses the “union” of paste and glue in the last paragraph below.

“It is the union of the two pastes [hide glue and flower paste] which gives a great deal of strength to the back” Dudin, 1772

By the end of the week-long workshop, I had fallen in love with the properties of how well it adhered.  By itself, the fish gelatin had a long working time and didn’t stick until it was nearly dry – but when mixed with wheat starch paste, it combined the best of both worlds.  There was both the initial tack from the paste and a strong adhesion from the gelatin after dry.  I wasted no time in ordering my own sample supply.

Over the past year, I’ve slowly incorporated the fish gelatin in treatments and testing more applications. 

Ashleigh Ferguson Schieszer uses the 40:60 mixture of fish gelatin and wheat starch paste to hinge encapsulations into an album, ensuring the heavy encapsulations with paper hinges stay adhered.

I first successfully used it to hinge-in heavy encapsulated sleeves into an album containing lung cross sections. After ultrasonically welding a paper hinge into an encapsulated sleeve, I applied the mix of wheat starch paste and fish gelatin to adhere the hinge to the scrapbook stubbing and had wonderful success.  I was able to adhere with confidence that the encapsulation would stay in place and was able to avoid disbinding and resewing.  At one point during treatment, I found I needed to reposition a hinge.  I am happy to report the mixture was as easily reversible as wheat starch paste alone!

Most recently, I played around with using it for photographic emulsion consolidation. I used it first as a barrier layer before inpainting, and then to add sheen to in-painted photograph regions that were originally matte in comparison to the surrounding gelatin coating. It seemed extremely easy to apply and clean up was less messy than other photographic gelatins I’ve used in the past.  The sheen was just the right amount of gloss I needed without being overly shiny.  And, best of all, no heat required.

Examples of photographic condition issues where the fish gelatin was tested: flaking emulsion was consolidated and a barrier layer was applied before inpainting.

We’ve also used the gelatin to stabilize breaks in a wooden box originally used to house a Richter’s architecture game from the early 20th century. Jeff Peachey’ main use is to line spines. He’s found it not only has better adhesion than straight paste, but makes the spine feel slightly more solid and resistant to torsional forces

Applying fish gelatin to adhere spine linings

In the future, I imagine this gelatin would have excellent potential in media consolidation. In all these uses, I couldn’t be more thrilled to not have to pull out my baby bottle warmer to set a beaker of gelatin on.  As a result, there was no fuss in worrying about how long the gelatin was heated and if it was losing its properties due to heat!

Example of using a baby bottle or coffee warmer to re-heat pre-made gelatin during typical use

In terms of shelf life, the dried granules can be kept indefinitely like unmixed wheat starch paste.  Once mixed, Jeff suggests that he’s found the adhesive properties hold up for about a week in the fridge; however, it does begin to smell fishy after just a day. So unlike wheat starch paste, if you’re adverse to the fishy odor, you’ll only want to make up as much as you’re planning to use for one day. 

Interested in getting your hands on some?

I found the product used at Weisman is no longer supplied by Norland, but I was able to track down what appears to be the same product through AJINOMOTO NORTH AMERICA, INC.  If you’re interested in trying it, message Henry Havey, the Business Development Manager of Collagen & Gelatin at haveyh@ajiusa.com to request a sample of High Molecular Weight (HMW) dried fish gelatin. 

They provided me with a 500- gram sample at no cost and confirmed it was a Type A fish gelatin with a zero bloom strength. Henry Harvey can also provide a pricing quote should you be interested in ordering a full supply which comes in 25 kg packs. They also provided the following product data info sheets.

Fish gelatin sample acquired by the lab in a 500 gram sample bag

While I still covet my isinglass cast films I created from boiling dried fish bladders, as well as our mammalian photographic grade type B gelatin, this HMW fish gelatin is a welcome addition I’ve added to my tool kit.

Ashleigh Ferguson Schieszer [CHPL[] – Special Collections Conservator, Co-Lab Manager

Bibliography

Dudin, M. The Art of the Bookbinder and Gilder. Trans. by Richard Macintyre Atkinson. Leeds: The Elmete Press, 1977, p. 51. (Originally 1772)

Nanke C. Schellmann, Animal glues: a review of their key properties relevant to conservation, Reviews in Conservation, No. 8, 2007, pages 55-66

Foskett; An investigation into the properties of isinglass, SSCR Journal ; The Quarterly News Magazine of the Scottish Society for Conservation and Restoration, Volume 5, Issue 4, November 1994, pages 11-14

World Sturgeon Conservation Society, A Quick Look at an Ancient Fish, 4th International symposium on sturgeon, Oshkosh, Wisconsin, July 8-13, 2001 https://www.wscs.info/publications/proceedings-of-the-4th-international-symposium-on-sturgeons-iss4/

Soppa, Karolina; Zumbuhl, Stefan; and Hugli, Tamara,  Mammalian and Fish Gelatines at Fluctuating Relative Humidity, AIC 51st Annual Meeting, 2023