I’m excited to be teaching this one week workshop in the fall. It is based on the types of treatments for leather bookbindings that I use most in my own book conservation business. Emory University, the site host, has a board slotting machine which participants will be able to try out. Atlanta is a hopping city, inexpensive to fly to, great food, and the weather is usually pleasant in early November. I will also be giving a lecture on the history of book boxes Friday November 2, if you want to spend the weekend. Please join us!
***
The Conservation of Leather Bookbindings
Emory University Libraries, Atlanta, Georgia
November 5 – 9, 2018
Sponsored by the Southeast Regional Conservation Association.
In this week-long intensive workshop, students will be introduced to a wide variety of current techniques used to conserve leather bookbindings. Bookbinders, technicians, and conservators who wish to learn, expand, or refresh their treatment skills are all welcome. Previous bookbinding or conservation experience is required.
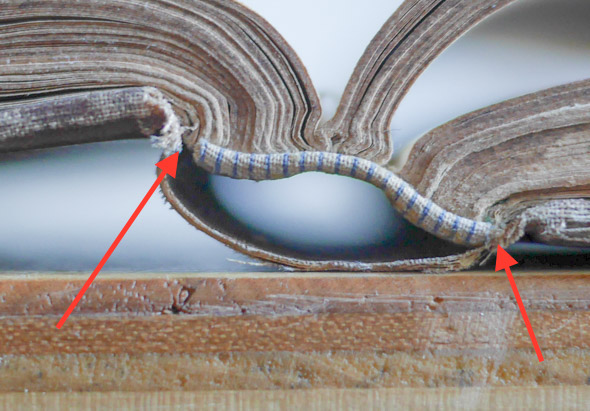
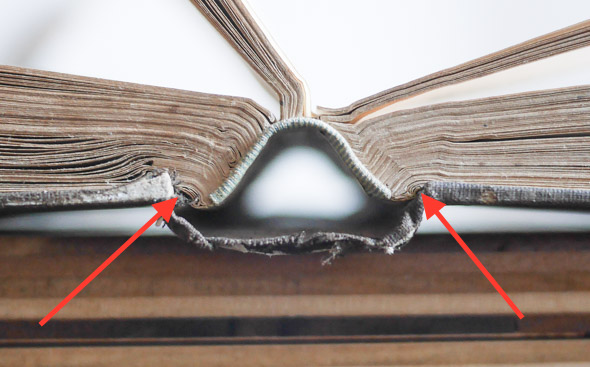
Detached boards are the most common place leather bookbindings fail, and all five primary methods of treating this will be taught: mechanical sewing extensions and tacketing, inner hinge repairs, interior-board repairs (both splitting and slotting), outer joint repairs, and several styles of rebacking. Many treatments involve a combination of these techniques. Questions concerning methods of consolidating older leather, the archival qualities of modern leather, and leather dyes will be discussed. A variety of methods to pare, consolidate, and lift leather will be introduced. Since a sharp knife is crucial to success in any leather work, sharpening will also be taught.
Students should bring six to eight non-valuable leather bound books to work on, though there will be additional books provided to practice with. Participants will be taught how to pare leather with a knife, use a board slotting machine, a modified 151 spokeshave, a variety of lifting knives and tools, and a double edge razor blade paring machine. There will be individual consultations with students before the workshop to discuss treatment goals for their chosen books, and determine if extra materials or tools might be required. Decision making based on the actual books will be discussed. The primary goal of this workshop is to equip participants with a more nuanced understanding of the pros and cons of currently practiced leather conservation techniques, gain supervised experience while performing them, and feedback when they are completed.
Application: Registration is limited. Participant selections will be made by the SERCA Board of Directors via the following order: SERCA members (new or renewing), practicing conservators in the Southeast, and other qualified applicants. Applications are due Friday September 14th, 2018.
Please send your resume and one paragraph stating why this workshop would be useful in your conservation career to: Kim Norman, Head of Library Conservation at Emory University (kim.norman@emory.edu)
Cost: $900 for existing SERCA members, $925 (including $25.00 SERCA annual membership fee https://sercaconservation.org/membership/) for new and renewing SERCA members. Payment taken after review of applications.