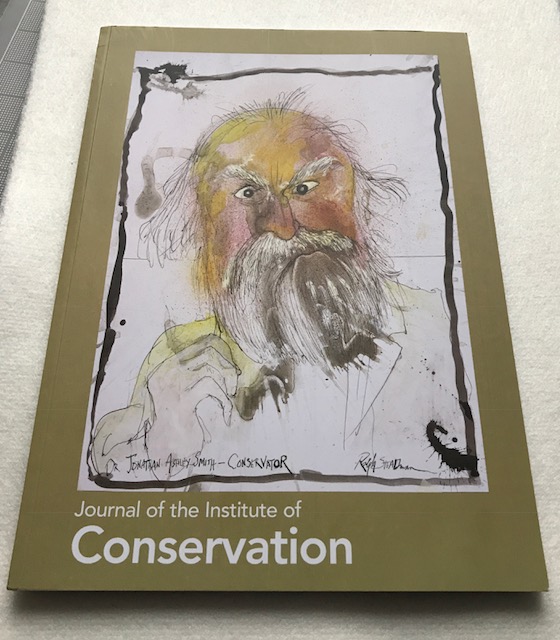
The most recent Journal of the Institute of Conservation (Vol. 41, No. 1, 2018) is a Festschrift for Dr. Jonathan Ashley-Smith. Ralph Steadman drew the cover, especially for this issue. Ashley-Smith is officially a conservation rock star!
You need to be a member of ICON to read the whole journal on-line. So join.
Selected articles from other issues are open access, including Ashley-Smith’s important 2016 article, “Losing the Edge: The Risk of a Decline in Practical Conservation Skills.” Although the title implies a depressing state of affairs (losing, declining) it is actually filled with empowering techniques to reverse some of the trends he anecdotally observes. There is much worth reading and discussing in this article: he considers a broad swath of issues surrounding conservation, handwork, craft, how we learn hand skills, and even how we loose them. Some of my own thoughts about losing hand skills are here.
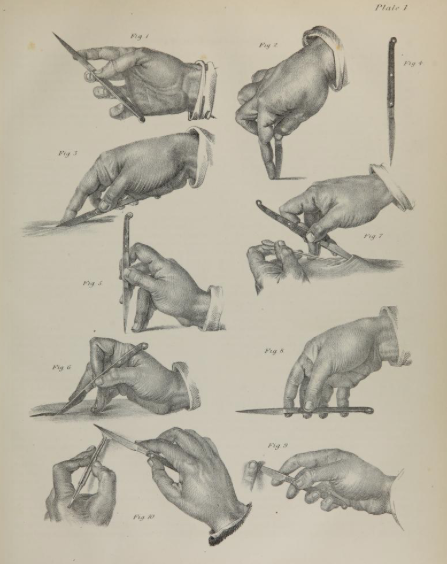
At the risk of overusing the comparison between conservators and surgeons, I’ll offer an example of my own then one from Ashley-Smith. When teaching a sharpening workshop, we look at the first two plates from Joseph Pancoast’s Operative Surgery. They are great reminder for the students that hand skills need to be learned, and for me to make the subtleties explicit. Many students pick up a tool, turn it over a few times in their hand, hesitantly try it out, find it doesn’t seem to work, and set it down, convinced that they don’t have good hand skills. But hand skills need to be learned, and there are easier and more difficult ways of manipulating tools.
Learning traditional techniques of tools use are often easier than trying to figure it out on your own, which is why they became traditional in the first place. Just consider the variety of hand positions Pancoast instructs the surgeon to learn in order to control the bistoury, pictured below. There is a following plate of even more advanced moves. I doubt many of us could come up with these on our own. Even though I have not used a bistoury, the hand positions make sense for the tasks I can figure out, like depth control (Fig. 2) and extra power to make an incision (Fig. 3). Perhaps it is better not to interpret all of them.
In “Losing the Edge”, Ashley-Smith describes an even more relevant surgical analogy to conservation, found in J.W. Peyton’s 1998 “Teaching and Learning in Medical Practice”. Peyton offers a pedagogical model for learning hand skills. I will try it out on the graduate students enrolled in the Historical Book Structures Practicum this summer. Traditionally, hand skills are taught by the monkey see, monkey do approach: the instructor demonstrates (sometimes with verbal descriptions of what their hands are doing), then the students copy what was done, often with little understanding why.
Ashley-Smith observed that surgeons are not ashamed to use the word “craft” in the context of their work, instead they are proud of it. Peyton presents a refined method of teaching craft skills: not only does the instructor demonstrate three times, but before the students perform the action, they are required to describe each step in advance. Another advantage of this method is that the student is exposed to seeing the action performed at real speed. Old timer conservators sometimes complain about how slowly younger conservators work: could part of it be they were never exposed to work done at real speed, only the slower, linguistic heavy, demonstration speed?
These are Peyton’s four steps:
1. Demonstration of the skill at full speed with little or no explanation.
2. Repetition of that skill with full explanation, encouraging the learner to ask questions.
3. The demonstrator performs the skill for a third time, with the learner providing the explanation at each step and being questioned on key issues … the demonstrator provides necessary corrections. This step may need to be repeated several times until the demonstrator is satisfied that the learner fully understands the skill.
4. The learner carries out the skill under close supervision describing each step before it is taken.
— J. W. Rodney Peyton, Teaching and Learning in Medical Practice (Rickmans- Worth: Manticore Europe, 1998), 174–7.
Excessive? Maybe for most bookbinding operations, but certainly not for medical operations. His model really forces the student to observe what they are doing and why they are doing it, and to think ahead to the next step. Ironically, it is all to easy for students to gloss over important aspects of hand movements during a demonstration. This is understandable, since most of the motions are not all that interesting, or even important. Invariably, they miss the most important part.
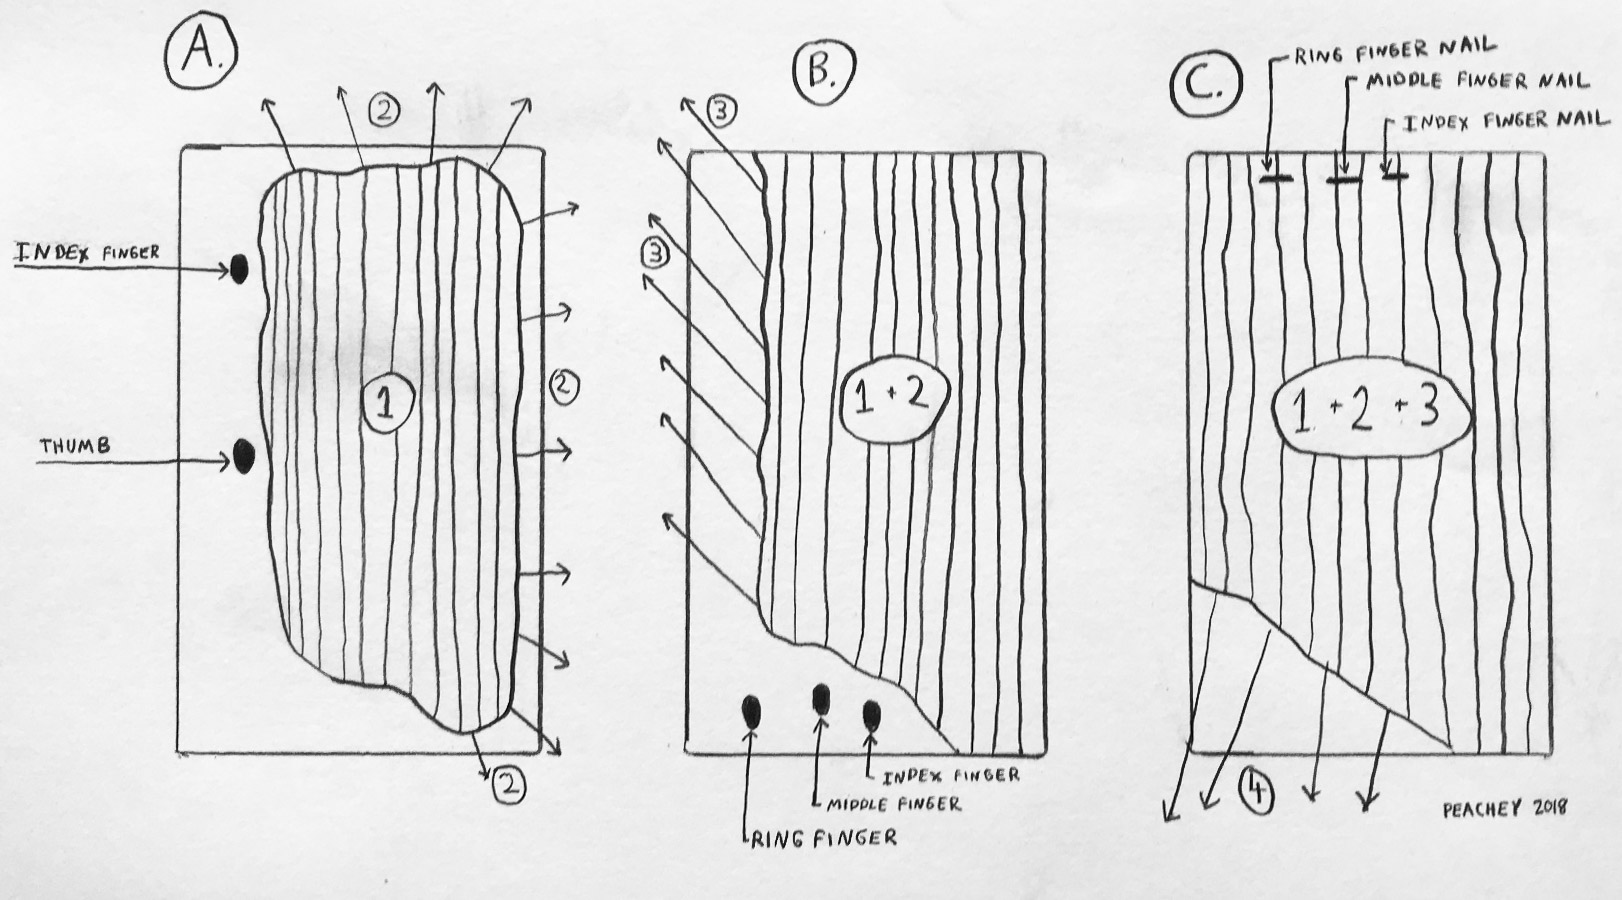
Sometimes in step 3, it is more relevant for the student to draw or diagram the process, if it is cumbersome to verbally describe. I doubt Peyton’s pedagogy can be adapted for every stage in bookbinding, but some steps — like sewing, forming headcaps, cutting corners — lend themselves easily to his procedure. Since many specific operations in bookbinding are similar, this method could be spread across a longer format workshop.