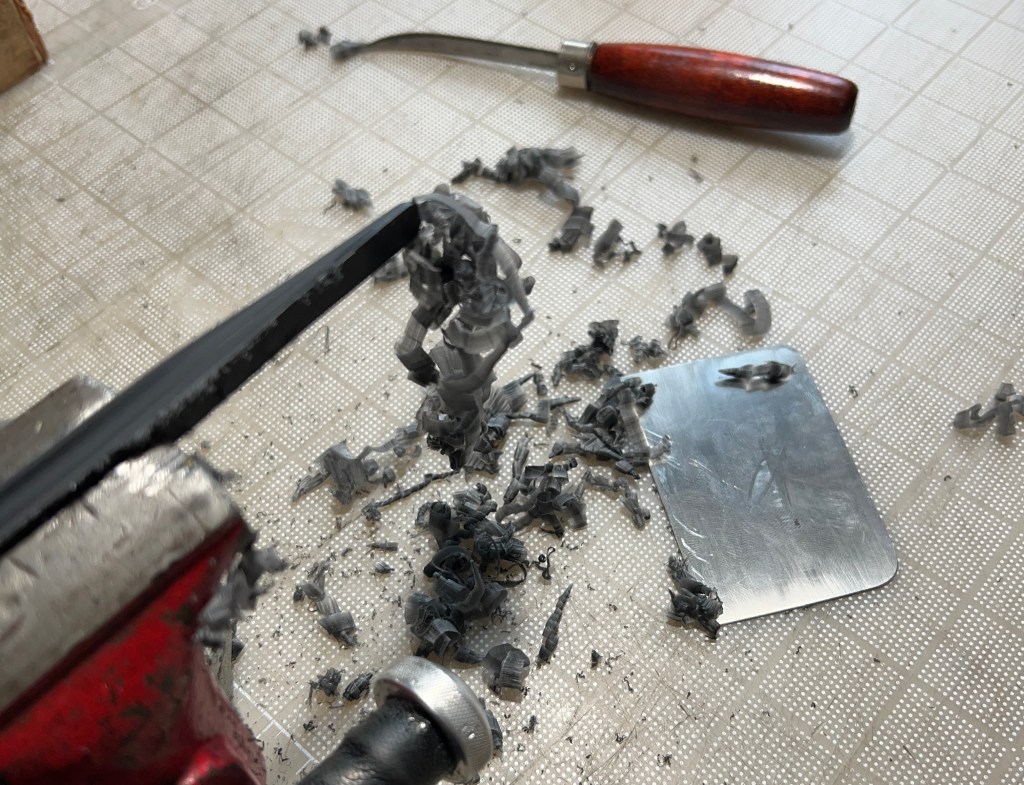
For dust free Delrin finishing, we will use a cabinet scraper and wet sand.
Conservation Hand Tools: Making, Modifying, and Maintaining
Workshop Description
Most interventive conservation treatments are mediated through hand tools. Many of these tools had their origins in particular craft traditions; but conservators often modify them for particular uses. Tools become embodied in use, extensions of a conservator’s hand, sense of touch, and intention. Personal hand tools often become prized arrows in a conservator’s quiver.
This five day workshop emphasizes simple and safe methods of working hardened tool steel, stainless steel, Delrin, wood, and bamboo. Progressively more difficult techniques will be introduced during the week using primarily hand tools. This workshop will be tool-centric; for example, hand sawing — with the appropriate blade and technique — will be used for all the materials introduced. Choosing materials appropriate to the desired task will be emphasized. Possibilities include tools for cutting, folding, prying, delaminating, lifting, scraping, and burnishing.
Participants will complete a number of tools of their own design during this workshop. Examples of common existing tools — such as delaminating or lifting tools — will be provided as prompts. One goal is to free participants from the plethora of misinformation and mystique that surrounds knife sharpening, and learn fundamental freehand techniques applicable to any edge tool. Another is to gain competence in mechanical problem solving and practical hand tool use. Participants are encouraged to bring their own tools for discussion, possible modification, and repair.
Making tools is engaging, fun, and useful. It is also highly addictive. Consider yourself warned.
Workshop topics
• Basic tool use for stock reduction: sawing, filing, abrading, scraping, drilling, tapping
• Understanding what makes something sharp, efficient hand sharpening
• Tool design and mechanical thinking in general
• Making a high carbon, M2 tool steel knife by stock reduction
• Differences and similarities in shaping Delrin, Wood, Bamboo, and steel
• Tool handles, sheaths, and handle ergonomics
• Connoisseurship of vintage tools and tool maintenance
• Safe use of power tools
Please join us for an intensive toolmaking week at Emory University October 7-11, 2024!
At first glance, leather paring seems quite straightforward. You take a sharp knife, move it along the leather in a series of cuts, and gradually reduce the thickness. What’s so difficult about this? If you are using a spokeshave, just push it over leather to gradually reduce the thickness. Done. A razor blade paring machine? You don’t have even have to know how to sharpen the blade, just pop in a new one, and simply pull the leather through. Yet, like many craft activities, what is simple conceptually can take some time — often a frustratingly long time — for your hands to learn what your head knows.
There are three common methods of paring leather: a paring knife, a modified spokeshave, and a double edge razor blade paring machine. Most binders use a combination of these depending on the task. All have advantages and disadvantages. All have a learning curve. All are useful arrows in a bookbinder’s quiver.
CONTENTS
I. AN OVERVIEW OF LEATHER PARING KNIVES, TOOLS, AND MACHINES
II. HOW TO EDGE PARE WITH AN ENGLISH STYLE KNIFE
III. DETAILS OF ENGLISH KNIFE TECHNIQUE
IV. SURFACES FOR PARING
V. AN EXHORTATION
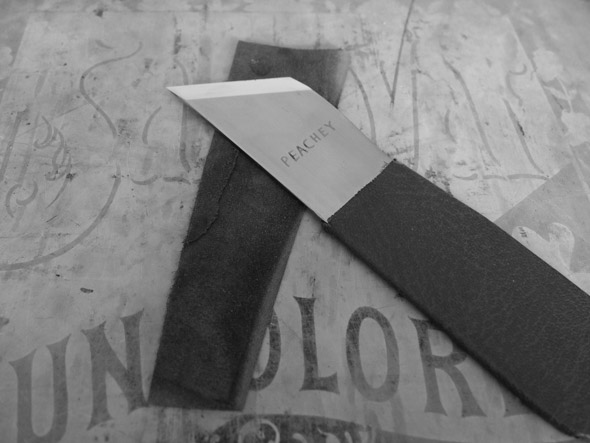
Edge paring with an A2 English style knife showing tip paring.
I. AN OVERVIEW OF LEATHER PARING KNIVES, TOOLS, AND MACHINES. WITH CONSIDERATIONS OF THEIR ADVANTAGES AND DISADVANTAGES
Many bookbinders, when getting into leather binding, are surprised by the wide variety of leather paring knives and machines. In bookbinding terminology there are four basic styles of knives and they are named for the nations that generally use them: English, French, German and Swiss. Other leather crafts use different terminologies for similarly shaped knifes, and leather workers often refer to “paring” as “skiving”.
In addition to paring knives, many binders use paring tools and machines. Most commonly a modified 151 style spokeshave, a double edge razor blade paring machine, or more rarely a razor blade plane. If you have a lot of work, skins can be sent out to be split, often by an a band saw type machine. A few also thin leather by sanding or grinding. Below are my observations on the advantages and disadvantages of all of these.
A. ENGLISH STYLE KNIVES
In North America, most binders use an English Style knife for edge paring, often oriented around 45 degrees to its length, followed by a spokeshave for making a long, gradual bevels. This type of beveling is used for English style fine bindings and rebacking. The knife making firm G. Barnsley made the most common knives used by English bookbinders in the 20th century.
You will need a different style knife, a spokeshave, or a razor blade paring machine to thin larger areas
B. FRENCH OR SWISS STYLE KNIVES
French style knives are very popular with fine binders, many of whom were French trained. Both French and Swiss style knives have a round cutting edge, and the Swiss knife is usually a piece of steel without a handle One defining stylistic feature is a center mounted wood handle, however. The handle on the French knives has always puzzled me, since you tend to hold it more on the blade and rest your palm on the handle. The handle protrudes onto the leather, limiting the angle the knife can be held. To get lower paring angle, I was the first to introduce the top mounted wood handle.
ADVANTAGES
One knife can do it all, though some binders use this in conjunction with an English style knife
Can be used with a scraping motion for thinning anywhere in a skin, useful for headcap or spine areas
Round blades seem to stay sharp longer, since there is at least some area that is still sharp enough to get a “bite” into the leather
DISADVANTAGES
Much more difficult to resharpen
More difficult to learn to use
More difficult to control
Scraping with a knife is more dangerous than spokeshaving or using a razor blade paring machine
Joseph Zaehnsdorf. The Art of Bookbinding. 2nd. ed. (London: George Bell and Sons, 1890), 91.
C. GERMAN STYLE KNIVES
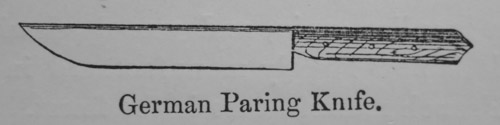
I’ve only used these a couple of times, so don’t really have an opinion. I did have a German trained student who used it expertly. The one I have is slightly flexible. In Zaehnsdorf’s 1890 The Art of Bookbinding, the German paring knife looks like a regular chef’s knife. Even the modern versions have a wedge shaped taper, so that the back is fairly thick and the opposite edge is sharp. Did the modern German style knife morph from a regular chef’s knife?
A modified 151 spokeshave with shaving collector thinning leather.
D. MODIFIED 151 SPOKESHAVE
A modified 151 style spokeshave is a powerful and effective tool for making long, gradual bevels in leather; ideal for rebacking or an English style full leather binding. It can also be used to bevel binders board. It is a lot of fun to use. These were originally intended for woodworkers, and I think binders started to modify these for leather starting in the 1920’s. Here is some of my research, and a tentative type study of 151 style spokeshaves.
ADVANTAGES
Much faster than a French knife for reducing leather thickness over a large area
Less chance of tearing through leather, especially with a shaving collector
A must for calf, which tears or gets marked in a razor blade paring machine
Can also be used to bevel board creating much less dust than sanding
DISADVANTAGES
Difficult to modify a regular 151 style spokeshave
There is a bit of a learning curve to learn to use them
The leather must be clamped to the stone or glass, or the leather can be traditionally held with your stomach
Cumbersome to use with leather smaller than 6 inches or so in one direction, to allow for room for clamps and motion of the spokeshave
A spokeshave can also be used to bevel binders board.
E. RAZOR BLADE PARING MACHINES: SCHARFFIX, KNOCK OFF SCHARFFIX, BROCKMAN, AND THE FELSTED SKIVER
Razor blade paring machines, including the Scharffix, Brockman and the new “Felsted Skiver” all use a very similar arrangement: a double edge razor blade suspended above an anvil or roller. These are very useful for thinning small or large areas flat. Razor blade machines excel at paring leather very thin. Common bookbinding applications include millimeter bindings, spines and corners for half bindings, and most commonly leather labels. A spokeshave is sometimes used to clean up ridges created from overlapping cuts on larger pieces.
My favorite paring machine is the original style Brockman, which is not available new anymore. One advantage of his design is a curved bed for for the razor blade, which gives it significant rigidity and positions it to cut into the the leather straight on, rather than at an angle. Older hand held double edge razor blade handles also bend the blade like this. Brockman told me he made the first 100 of them himself, which are painted blue, and the later black ones were manufactured for him. A third green cast version was briefly produced in the 2000s (?), which looked very nice, but I haven’t tried it.
There are rigidity problems with many Scharffix machines, so make sure to test them out before purchase. There are also extremely cheap knock-off versions of the Scharffix machines for around $50 or less on you know where. I bought one, thinking how bad could it be? After wasting three days trying unsuccessfully to get it to function I had my answer.
The Felsted Skiver is the newest machine. Malcolm Raggett designed and is selling these. He has tested a variety of commercially available double edge razor blades, which is very useful research, and confirmed the Feather as one of the best blades. I tried one for a short period of time and it worked quite well, much like an old Brockman.
ADVANTAGES
Short learning curve
The best for paring very thin, flat areas of leather, like labels or half-leather bindings
DISADVANTAGES
Difficult to create bevels (at least for me)
Almost impossible to use on vegetable tanned calfskin
This used to be common for french design binders, who even indicated what thickness the leather should be at various areas, through use of a template. I’ve heard these specialists are disappearing, though. We do have leather manufactures who will split a skin (or more likely a dozen) down to a certain thickness. This is an excellent option if you are an edition binder. If the skin is thick enough you can get both sides back. The machine that does this is like a toothless horozontal bandsaw. I’ve used Hohenforst Splitting Company and they did an excellent job on a difficult leather; undyed and unfinished calfskin.
H. SANDING OR GRINDING
I wouldn’t recommend either of these methods unless there are extraordinary circumstances. Not only do these methods produce a lot of hazardous dust, they are very slow and, at least in my experience, grinding is very uncontrollable. I have done this if the leather is exceptionally weak, or need to level chatter that has resulted from an improperly tuned spokeshave. In this case choose a very coarse sandpaper, around 80 US grit. Sanding an entire piece of leather for rebacking or covering is very tedious.
II. HOW TO EDGE PARE WITH AN ENGLISH STYLE KNIFE
“One of the most admired skills in bookbinding is the paring of leather, yet only sharp tools and confidence are required. Confidence is gained by experience, and sharp tools by a zealous consideration and care for knives.” Arthur Johnson, The Thames and Hudson Manuel of Bookbinding, p. 89
• As Johnson reminds us, make sure your knife is sharp. Strop it evenly on both sides to make absolutely sure. Then strop it again!
• Board your leather. This breaks down stiffness and reduces hard areas in the leather that can catch your knife, and cause it to veer unexpectedly. Boarding means folding your leather onto itself on your paring surface — flesh side to flesh side — and roll it over itself with your palms in four directions: top to bottom, side to side, corner to corner, and the other corner to corner.
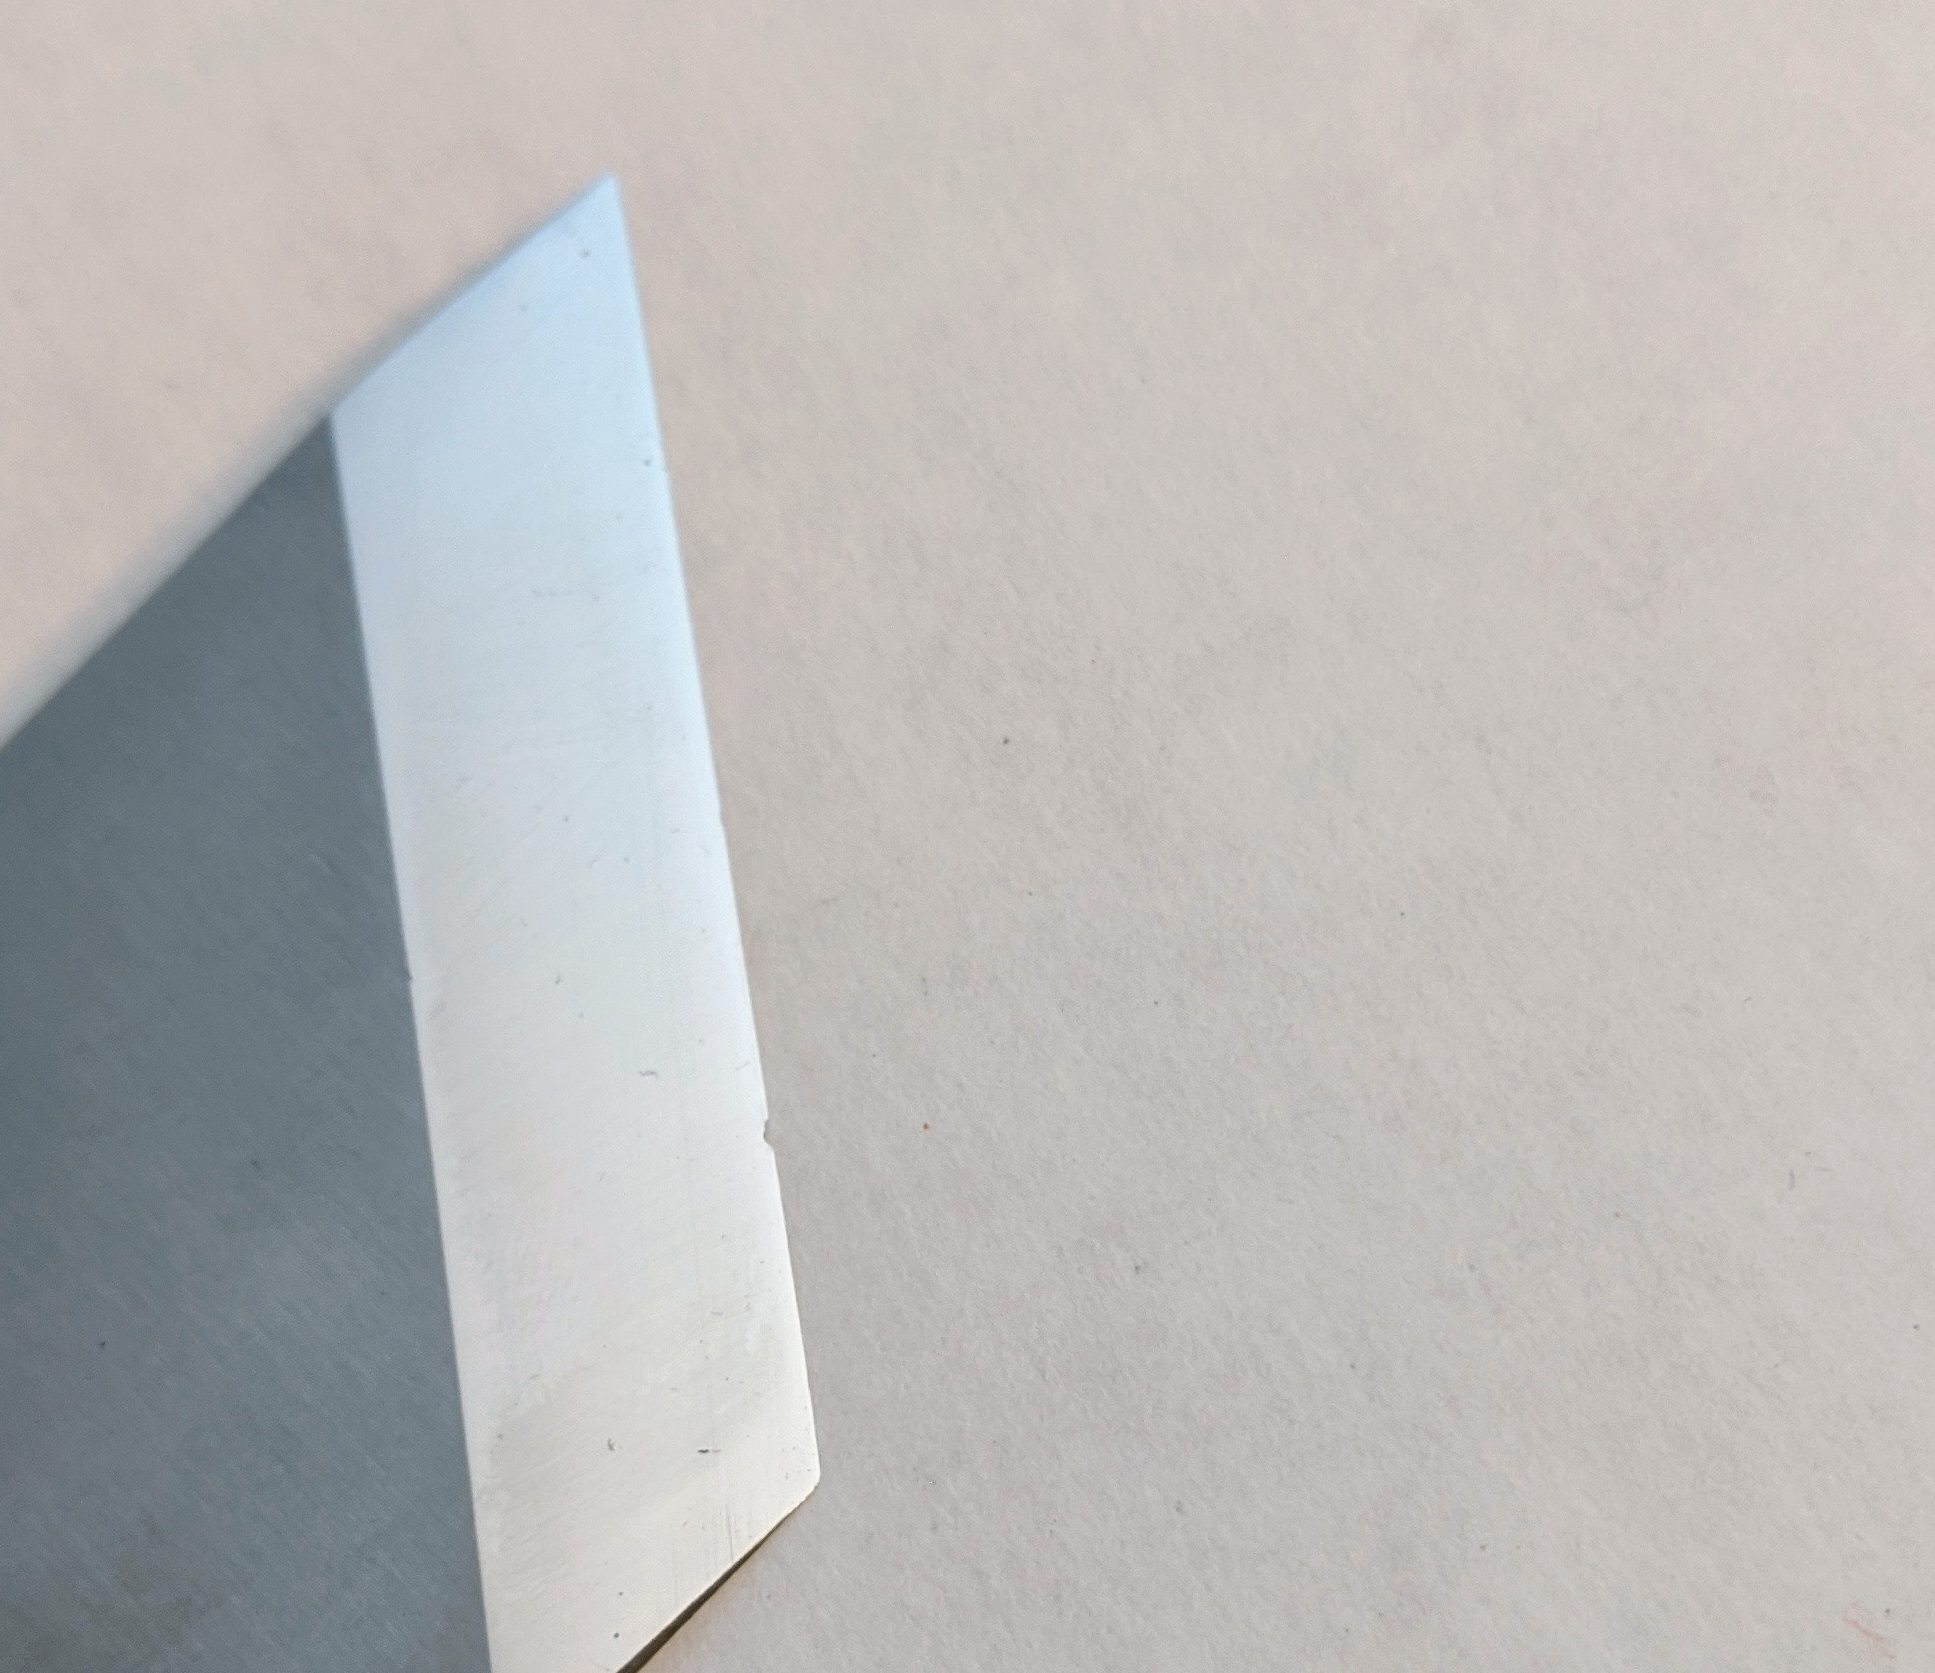
• Place the blade angle of the knife at roughly 45 degrees to the edge you are paring. See the image below for the difference between blade and bevel angles.
• Cut into the leather place the tip of the knife so it is just shy of the paring surface. It should cut at an angle through the leather, coming in from the edge about a quarter of an inch.
• Place the length of the knife at low angle, relative to the paring surface. You may need to place your hand off the edge of the paring surface to achieve this.
• Use the fingers holding the knife as a jig to hold this angle
• Use your left hand to push the knife across the leather, taking off one long continuous strip. If you knife holding hand is strong, and your blade sharp, you will eventually be able to do this without the aid of your left hand.
• When the strip is made, go back the beginning and repeat the process form the beginning, but hold the knife at a lower angle, taking off
• The most you can edge pare with an English knife is about an inch into the thickness of the skin. If you need a more gradual bevel on the leather, use a round knife with a scraping action, an M2 hybrid knife, or a modified 151 spokeshave.
III. DETAILS OF ENGLISH KNIFE TECHNIQUE
To flesh out the above, it is critical to pay attention to the blade angle of the knife, since it affects how the knife cuts, and the angle one holds the knife at, and consequently how the leather is cut. I’ve found that roughly a 40-50 degree angle works best for tip edge paring. First, a few terms defined. The blade angle is from an imaginary line 90 degrees to the length of the blade. I am calling a zero degree angle one that would be straight across where the dotted line is, pictured below would be roughly a 45 degree blade angle. The bevel angle is the amount of slope on the bevel, in the case of leather paring knives usually around 13 degrees. The diagram below is the style of knife a right handed binder would normally use. (1)
I’ve found there are two main issues that determine the optimal angle of the blade; how much the blade is skewed in use and how the knife is held. The way I hold and use an English paring style knife is outlined below, as are the reasons why I consider a 40-50 degree blade angle ideal.
Skewing the blade in use reduces the effective cutting angle, improving the initial cutting performance and not altering edge retention. Although the more acute the bevel angle in effect creates a sharper the blade, if it is too severe the cutting edge will be very fragile and quickly deteriorate. It is also difficult to sharpen, since the thin tip deflects. I haven’t figured out the math, but if the bevel angle is 13 degrees, I estimate an extreme skew reduces the effective cutting angle by half?
DIFFERENT WAYS OF USING AN ENGLISH PARING KNIFE
Although I outlined the a basic method of using an English knife above, I actually hold it in three ways when I am edge paring: first to make a series of cuts using moderate skew, then a few finishing cuts using extreme skew, and finally use the knife with no skew. This final way performs like a spokeshave and smooths everything out. It doesn’t seem to make too much difference if you pare across the skin, as pictured above, or push the knife away from you, which is the traditional heel paring.
THE FIRST CUT
To make a long, even bevel the angle of the knife held steady by my thumb and second finger on the other side of the the knife– they slide along the surface of the paring surface. In order to pare the leather evenly, the knife must be held at a consistent angle. (2) The angle the knife is held varies with the type of leather and skill of the binder- too high of an angle takes off virtually no leather, makes it more likely to slice through the flesh side of the skin and dulls the knife tip by digging into the paring surface. Too low an angle makes the knife difficult to control, since most of the cutting edge is engaged into the leather. Wide knives with long bevels exaggerate this problem. Right handed beginning parers may want to use the forefinger of left hand to push the knife along the leather. This allows one to concentrate on using the right hand to hold the knife at a consistent angle, as illustrated below.
After a first cut is made, a second (and possibly third or fourth, depending on how long of a bevel is desired) is made by holding the knife at progressively lower angles. The depth of the cut can be judged by changes in the color of the leather or folding the leather in half, which doubles any errors. If the leather is disturbed to check the progress, it is imperative that any stray bits be cleaned from under the skin, otherwise the knife will cut through these thicker layers.
THE SECOND CUT
As the leather becomes thinner, it becomes weaker, so I adopt the second knife position. I skew the knife towards a more extreme angle and press down harder, which creates a lower effective bevel angle. This helps prevent tearing the leather. It is much easier to take the leather off in long even strips with the first cuts, rather than try to correct mistakes later on. If there are many irregularities, sometimes it is easier to use a spokeshave to even things out. Note the fingers on my right hand used as a jig, to hold the knife at a consistent angle relative to the surface of the leather.
THE THIRD CUT
After the edge is pared to the length and thinness desired, I rotate the knife into the third position, so that it is not skewed, and push it forward to even the previous cuts out. This is almost more of a scraping action than a paring cut, and is meant to smooth out irregularities left from the previous cuts, not remove a lot of skin. The angle of the camera in the illustration seems to exaggerate angle that the knife is being held- in reality it is almost parallel to the skin. Again, a spokeshave could do this as well. The cutting edge of this knife is one inch, which is slightly larger than most turnins. Most of the time 7/8″ is a reasonable turn in width–compromising between giving a little extra room in case the leather is torn, and conserving leather. One unintentional consequence of the acidic nature of some leathers is that they rapidly stain the pastedown, making it possible to observe in detail the pattern of trimming and size of turnins. I admire the judgement (and frugality!) of some binders, capable of covering the book so economically that only a millimeter of two of leather extends under the pastedown in various places.
OTHER BLADE ANGLES
A roughly 45 degree angle seems to be the most comfortable in all three of the ways I hold the knife. I have a set of knives that I use when teaching which consist of 22.5, 45, and 67.5 degrees, in order to compare what is most comfortable for each individual, and most opt for a roughly 45 degree angle. Another consideration is the angle of the wrist when using the knife– I’ve found around 40-50 to be most comfortable. Keeping the angle of your wrist comfortable is important if you do a lot of production work, to avoid carpel tunnel syndrome. Any numbness or tingling sensation is possibly a very serious problem, and medical attention should be sought. Choosing a good quality knife, keeping it well stropped and sharp will also reduce the force needed to pare leather, reducing strain on the hand and wrist. Finally, a 45 degree blade angle is much easier to sharpen than a 67.5 degree angle for two reasons– it is easier to get even pressure across the entire width of the bevel (especially the tip), and there is less metal to remove, so the sharpening is more rapid. Paring leather is not difficult, as Johnson pointed out, it just takes some practice with a sharp knife, and an awareness of the blade angle.
***
NOTES
1. As a left handed binder pointed out to me, simply changing the direction of paring allows a right hander to use a left handed knife, or vice versa. Below I am comfortably using a left handed knife, holding the leather at the top and paring towards myself.
2. Some find it more comfortable to hold a knife with a handle. In this case, it is sometimes necessary to hold the handle area of the knife off the paring surface in order to achieve a low angle. This illustration also demonstrates side to side paring.
IV. SURFACES FOR PARING
I really don’t think it makes much difference, as long as it is smooth and reasonably hard enough. Keeping it clean and free of debris is probably more important than what material it is made from. Any small stray bit of leather can get trapped under the piece you are paring, and the additional thickness cause you to create a hole in your skin. Litho stones, glass, glazed porcelain tiles, 12 x 12 pieces of marble are all used successfully by binders I know. If you are cutting into your paring surface and damaging you knife, the problem is your technique, not the softness or hardness of the surface you are paring on.
I photograph many of my knives on litho stones, but not for functional paring considerations; rather it looks traditional, the stones are non-reflective, and also roughly 18% grey. In other words, perfect for photography. 18th century paring surfaces seem to generally be marble, I suspect the only reason litho stones became popular was that they were a cheap plentiful source of a flat surface in the late 19th. Save the litho stones for the printers or bookbinding photography.
Most introductory bookbinding manuals contain a section on leather paring. This can help learning different ways of holding the knife, and understanding the basic concept of gradual thinning. Videos (and there are lots of them) can also help; when it is well done it looks so easy! More information is better than less information. But really, boils down to getting a feel for it, or “embodied procedural knowledge” if you want to use a fancy term.
Finding someone to give you some feedback on your technique in a class or workshop can really speed up the learning curve, save a lot of time, and reduce wasted leather. Chances are if you are really struggling, something is wrong that can be fixed. Often it is your knife is not sharp enough. Sometimes just moving the knife a few degrees this way or that way can be the difference between success or failure.
But the best way to get better at paring is the most obvious: practice, practice, practice. So quit reading and make some shavings!
NOTE: the above is a compilation of revised blog posts I’ve written over the past dozen years concerning leather paring.
Knife sharpening can be an intimidating activity, and in many ways the plethora of information available — sometimes contradictory — makes it more difficult to know where to start. Sharpening is fundamental skill for many crafts, and knowing how to sharpen allows you to work more precisely, more cleanly, more safely, and more efficiently. Sharp knives can save you from ruining expensive materials or even complete projects. Sharp tools require less effort to use and can help protect your hands from repetitive stress injuries. Please note I also use the techniques below for spokeshave blades. Prehistoric humans knew how to sharpen, and so can you!
CONTENTS
I. STROPPING A KNIFE
II. TECHNIQUES OF STROPPING
III. MATERIAL FOR THE STROP
IV. COMPOUNDS FOR THE STROP
V. THE TWO BASIC PRINCIPLES OF SHARPENING
VI. THE TEN COMMANDMENTS OF SHARPENING
VII. TWELVE WAYS OF TESTING SHARPNESS
VIII. TIPS FOR GETTING THE MOST OUT OF YOUR 3M FINISHING FILM
IX. OPTIONS FOR FIXING A CHIP IN A KNIFE
X. RECOMMENDED SHARPENING BOOKS
XI. RECOMMENDED SHARPENING LINKS
XII. REVIEWS OF MY SHARPENING WORKSHOPS
I. STROPPING IN GENERAL
If your knife was sharp and is getting dull, stropping is a quick and easy way to keep it sharp enough to pare leather. Or anything else, for that matter. I tend to strop almost constantly, and if you get good at the technique, a good quality knife will stay sharp by stropping a long time.
Some people object to stropping, since it makes the cutting edge more obtuse over time, which is true. But I find the time saved doing it, verses going through a longer sharpening sequence each time it becomes dull, results in less time spent overall sharpening, and more time working. YMMV.
Stropping is a motion which pulls the cutting edge away from a substrate—leather, paper, wood, etc.—perpendicular to the cutting edge, with or without additional compounds. Stropping not only produces a very sharp final edge after sharpening, but it is an easy way to renew a slightly dull edge without having to go through the entire resharpening process. I tend to strop my knives whenever they feel a bit dull, or I have to apply excess pressure when using it, or when edge paring very thin leather.
II. TECHNIQUE OF STROPPING
The above video illustrates the technique I use in stropping, using the materials I will discuss below. I strop all the knives I sell using this method, and use it to keep my own knives in shape. There are two key aspects. First, always draw the blade away from the cutting edge to avoid digging into the leather, which is sometimes called a “trailing stroke”. Second, it is paramount to hold the knife at the exact bevel angle it was made, and keep this angle consistant throughout the stroke. If you raise the angle, even a few degrees, the cutting angle will rapidly become too obtuse and you will have to resharpen or possibly even regrind it. Similarly, the back needs to be kept flat.
I find a strop that is 12-15 inch long and 2 or 3 inches wide ideal. If it is shorter you will have to reposition the knife an inordinate number of times, which slows the process and may introduce more errors. If the strop is too long it is difficult to maintain a consistent angle on the blade throughout the length of the stroke. If the knife is slightly wider than your strop, just angle it a bit so it fits.
I count the number of strokes I do on each side to keep them even, a dozen times on each side is a reasonable starting place. If the knife is still not sharp, then strop it some more. If it still is not cutting well, it may need to be resharpened or reground. Although you are *just* rubbing a knife on a piece of leather, don’t be fooled that you are not doing anything: all the black marks are metal that have come off the blade.
For round blades, I do the same stroke on the back, but on the bevel gradually roll it throughout the length of the cutting edge, from side to side, during each stroke.
Eventually, however, even careful stropping will gradually create an obtuse cutting edge. It may look sharp and have a mirror shine, but it will need to be resharpened using your preferred sharpening system.
III. MATERIAL FOR THE STROP
I prefer a two stage stropping. First I strop on the flesh side of horsebutt, which is dressed with a .5 micron green honing compound. Horsebutt strops available here. You can then perform a secondary stropping on undressed flesh side of calf, or if you really want a refined edge try this .1 micron diamond compound impregnated Super Strop. Other substrates for strops are wood, MDF, binders board, cowhide, mat board, etc. Anything firm and flat can work, but keep in mind materials that compresses too much will round over the cutting edge more quickly. I prefer horsebutt over cowhide because the surface lasts longer, it is firmer, and it is a traditional material for high quality strops. There is nothing magical about it, it just holds up better and is firmer.
I generally use the strop on a hard flat surface but some people mount them to wood or other flat material. The speed that you strop at does not seem to make much of a difference, as long as a consistent angle is maintained. There are also a variety of leather belts and discs to attach to power machinery, but I find it is too easy to round an edge using these, and it is not really much of a time savings since stropping does not take much time by hand.
IV. COMPOUNDS FOR THE STROP
My preferred stropping compound is a .5 micron green chromium oxide buffing compound. I now sell a convenient 1 oz. bars of them, and my sharpening system also now comes with one. I like the edge this compound gives to the knife, and it does remove metal fairly quickly. Chromoglanz is another popular option among bookbinders, though I don’t know how precisely the abrasive is sized, and I personally don’t like the way it feels when you are stropping—it is very slippery. It seems to be better at polishing than establishing a cutting edge. There are other types of powders and honing compounds available as well, jewelry suppliers often have a wide variety. I’m currently hooked on a .1 micron diamond paste for a final finish.
Careful stropping can keep an edge tool cutting well for a long time. Eventually, though, you will have to resharpen the blade. Below are some principles. There are TONS of step-by-step guides on the web, if that is how you learn best.
V. THE TWO BASIC PRINCIPLES OF SHARPENING
There are two basic principles of freehand sharpening. First off, you will need to learn how to hold your knife at a consistent angle relative to the sharpening stone. Secondly, you will need a grit progression of abrasives.
If you knife has a single bevel , it is straightforward to lay the back flat on your stone and rub it back and forth until a burr develops. If the bevel of your knife is large enough, you can also feel when the knife matches it when you place it on the stone. I find it easier to keep the angle consistent by sharpening the knife from edge to edge, rather than tip to heel, like most sharpening jigs do. This is not a traditional method, but I find it easier to maintain a even angle.
To use the sharpening system I sell as an example of a grit progression, first start with an 80 micron. Sharpen the back and the bevel (or vice versa). Alternate sides. When are you done with a grit? When you feel the burr, or wire edge as it is sometimes called. Then move to the next finer grit and repeat the process. I use an 80 – 40 – 15 – 5 – 1 micron sharpening progression. There are many others, but I find this progression works quickly with 3M finishing film and the A2 and M2 type steel blades I prefer for paring leather. Different types of steel seem to work better with with different abrasives.
Below are ten key precepts to keep in mind when sharpening, in no particular order.
VI. THE TEN COMMANDMENTS OF SHARPENING
1. Thou shalt not round the bevel or the back.
2. Thou shalt not use jigs.
3. Thou shalt look at the scratch patterns in the metal.
4. Thou shalt use a bevel angle appropriate for the knife and task.
5. Thou shalt not covet thy neighbors knife.
6. Thou shalt sharpen side to side.
7. Thou shalt use a grit progression and entire surface of the stone.
8. Thou shalt not let thy sharpening system become glazed over.
9. Thou shalt not advance to the next grit until the burr develops.
10. Thou shalt not insult thy neighbor by insisting on the absolute superiority of any technique or system.
COMENTERY ON THE TEN COMMANDMENTS OF SHARPENING
[1] Rounding the bevel, or the back, is the most common mistake in sharpening. Though the knife may look ‘sharp’– ie. polished– it will not cut if the included angle becomes too obtuse. Even with careful stropping, eventually the knife will need to be reground and resharpened. A back bevel works fine as long as the included angle is within the desired angle. In practice, a small amount of rounding always occurs when sharpening and stropping: the goal should be to minimize it.
[2] Not relying on jigs will give you much more freedom, and speed, in sharpening a variety of tools. Many bookbinding knives do not fit it standard jigs, which are often designed for woodworking tools. The hand motions and muscle memory necessary to sharpen freehand is often very similar to the skills necessary to use the knife properly. Throw away your crutches and walk!
[3] Looking at the visual evidence of what you are doing when sharpening is paramount. Even slightly changing the angle of the knife when moving to a finer grit will show exactly what the new grit is doing. A 10 power magnifying lens is very revealing. Always sharpening in the same direction will disguise the effects of the new grit, often resulting in an unpleasant surprise when a final stropping reveals many deep scratches.
[4] Always use the lowest possible blade angle for the task at hand. For paring leather, this is around 13 degrees.
[5] Knives are very personal. You need your own, and get to know how to use and sharpen the particular angles it develops. Most people sharpen with small idiosyncratic deviations from a geometric ideal, and learn to work with these deviations in practice. A well made knife will last the rest of your career, don’t purchase or make an inferior one. In the bookbinding world, it is a major faux pas to borrow a colleague’s paring knife — don’t be a rube!
[6] It is much easier to maintain a consistent bevel sharpening side to side freehand (parallel to the cutting edge), rather than sharpening from the cutting edge to the start of the bevel. I have noticed this in student work as well as my own. This does necessitate a flat stone or sharpening surface, however. Of course, it is possible to sharpen in almost any direction, as long as you hand is comfortable and you are able to maintain a consistent angle.
[7] It is much faster and easier to have a series of small grit progressions, rather than one or two large ones. This also results in less wear per stone. Always buy the longest stone you can afford and use the entire surface of it — moving the blade 10 inches once is basically the same as moving the blade 2 inches, 5 times. Hogging the center will wear a stone unevenly.
[8] Always use a lubricant. A glazed system will generate heat and cut very slowly.
[9] Feeling, or looking for the burr lets you know that the two planes have exceeded the point where they meet. This assures you there are no flat (dull) areas on the cutting edge. With very fine grits it may not be possible to feel or see this.
[10] Almost any sharpening system can work, if you know what you are doing. I’ve seen people break every one of these commandments and still get a great edge.
So now you have sharpened your knife. Or have you? How do you know it is sharp?
VII. TWELVE WAYS OF TESTING SHARPNESS
1. Visual inspection. When looking directly at the blade edge, with a light source behind you, are there any reflections? If so, these are dull, bent or chipped areas. The cutting edge should be an almost invisibly smooth black line.
2. Visual inspection, with magnification. When looking at the side of the blade, the smoother it is, the sharper it is, and presumably the longer the edge will last. Brent Beach, for example, measures wear in terms of pixels in a microscopic image at 200x. Leonard Lee’s Complete Guide to Sharpening has a number of electron microscope images of blade edges. Take heart, though, even a “sharp” edge will look like the Rocky Mountains if enlarged enough.
3. Shave a few hairs on your arm. If it is sharp enough to shave, it is probably pretty good. WARNING: THIS IS DANGEROUS
4. Rest the blade on a pen held at a 15 degree angle. If the blade, with just the weight of the knife catches the plastic, it is sharp. If it slides off, it is dull. The closer to parallel the pen and the knife are, the sharper the blade is.
5. Do this same test holding the blade and GENTLY and see if it catches on your fingernail. WARNING: THIS IS DANGEROUS.
6. Tsujigiri. This test likely seems a myth. Supposedly, at one time, samurais tested their swords by the number of torsos they could cut through in one stroke. The sharpest one was a #5. WARNING: THIS IS DANGEROUS, IMMORAL AND ILLEGAL.
7. For kitchen knives, see if they can penetrate a tomato or onion, with no downward pressure and no sawing. There are many variables in the toughness of the skin of a tomato though, I imagine.
8. Longer blades can be tested by slicing paper, even toilet paper. There are many youtube videos of this. Slicing cardboard, because of its consistent and abrasive nature, is often a field test of edge durability.
9. Feel the edge ACROSS THE BLADE with your finger, applying virtually no pressure. The smoother it feels the sharper it is. You should be able to feel any slight irregularities, indicating a dull area. WARNING: THIS IS DANGEROUS.
10. Test it on a difficult to cut substrate like styrofoam, cork, or balsa wood.
11. Send the knife to CATRA. They will qualitatively test for initial cutting performance, edge durability, and edge geometry. This will, however, dull your knife, so it is designed for production samples.
12. Possibly the best test is just to use it. Providing you are familiar with the material you are using it on, you can often tell instantly if it is sharp depending on how much force you have to apply.
Here is a sharp M2 Hybrid style knife in action.
VIII. TIPS FOR GETTING THE MOST OUT OF YOUR 3M FINISHING FILM
Keep it clean and use plenty of water! One of the most common mistakes in sharpening is to allow your stone or film to glaze over. This significantly increases sharpening time, since the knife is not abraded by the grit, but is burnished against embedded steel. Not using enough lubricant is a common reason for this, as is not regularly cleaning your substrate. Depending on the size of the grit, either a microfiber rag or a white vinyl eraser works best.
My sharpening setup.
My sharpening setup, above, consists of a bright swing arm lamp mounted directly above a cork faced workbench (PSA cork shelf liner), a microfiber rag, a large squeeze bottle of water, and the Peachey Sharpening System. I find it more comfortable to sharpen at a lower height, around 34 inches, than my regular bookbinding workbench. Many hundreds of knives have been sharpened here!
The microfiber rag is perfect for cleaning larger grit 3M micro-finishing film, from 80 to around 15 microns. This rag was white when I purchased it, a testament to how well it picks up and retains small metal particles. I also use it to clean off the knife between grits in order to examine the scratch patterns.
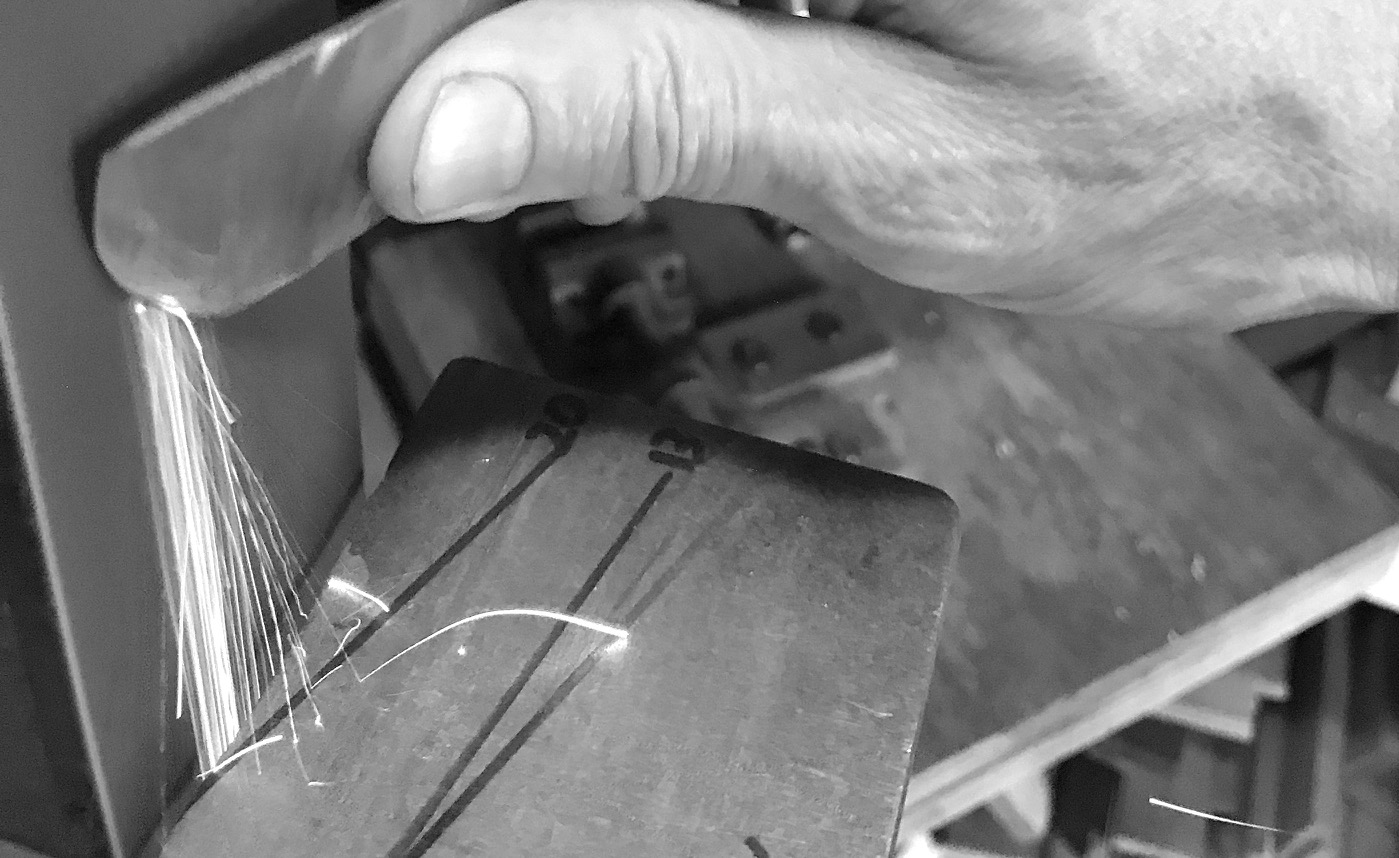
Using a white vinyl eraser to clean swarth.
For 5 micron and smaller grits, a white vinyl eraser works wonders. Pictured above is the neon lime green 1 micron film, which glazes quite easily. Using the eraser on coarser grits eats it up too quickly.
Of course, over time, the abrasive will wear to the point nothing much happens, and you will need to replace it. I can usually sharpen ten knives or so on one piece of 2 x 11 inch film.
By using plenty of water as a lubricant, and cleaning the film after each use, the effective working life of finishing film will be prolonged.
IX. OPTIONS FOR FIXING A CHIP IN A KNIFE
I bet everyone has chipped a blade at one point or another. I’ve done it dozens of times. It happens. Sometimes completely regrinding the bevel is the best solution, sometimes not. Below are some options to consider, depending on the nature, size and location of the chip, how the blade is used, and what your sharpening set-up is.
A small chip like this will work itself out after a few resharpenings.
1) Live with it. This is often a good solution for small chips. It will make a weird little ridge in the leather (or other material), and you will have to go back over it with a different part of the knife, like removing the ridge between multiple passes of a double edge razor blade paring machine. As you resharpen the blade it will get smaller each time.
Hand forged Japanese gardening tool with the chip reground to function.
2) For large chips, alter the cutting angle around the chip so the blade can still function. The example above shows a huge chip, and fixing it by regrinding the bevel would have removed most of the knife. The previous owner cleverly fixed it by putting an edge on the large chip. This blade still works quite well for hacking small branches. In fact, I kind of like having the notched higher bevel area. Of course, this depends on what type and size of blade you have and how you use it.
The bevel edge of a chisel in very poor shape from abuse. A good candidate to regrind.
3) Regrind to the original bevel using the coarsest diamond stone you can find, at least a 220 US grit. Even though I have belt grinders, for a narrow chisel like this one, it is easier to control working by hand on a diamond stone. It really doesn’t take that long. And you can skip your HIIT tomorrow.
The bevel angle of this chisel was ground too shallow for how it was used, and the entire cutting edge rolled off on the left side. A good candidate to regrind.
4) Regrind to the original using a belt sander, belt grinder, Tormek, or a stone grinder. If the blade is wide or thick, and the damage severe, a complete regrind might be the best option. Obviously, it is quicker to have a machine do the work, rather than your arms. I highly recommend the Kalamazoo 1 x 42 belt sander if you are in the market for a new one. I’ve had one for over 20 years, and sometimes during workshops it has run almost continuously for a couple of days.
The width of this chisel was reduced (on the top) to get rid of a chip at the top corner.
5) To fix a chipped corner, if the width of the blade is not of that much importance to you, it is often easier to reduce the it rather than regrind the bevel, like on the chisel above. This can ruin a rare or important tool, though. Often the entire width does not need to be reground, as the image above shows, but it can be rounded towards the tip. This can be done by hand on a diamond stone or on a machine grinder. Sometimes only a small amount of the blade on the bevel needs to be ground, sometimes the entire length. In this case, it was an inexpensive Buck chisel that I use for crude chopping, and has little value otherwise.
A tip chip.
Solution: a new rounded tip.
6) If the tip or corner is chipped (which is very common) it can be easier to round it. Some prefer to have rounded tips on leather paring knives and other knives anyway. Think carefully if you want to keep the original bevel angle, or raise it slightly as in the above example. The above chip could also be fixed by reducing the width of the knife on the left side of the image.
Regrinding a knife back to the original bevel angle.
FINALLY, if after reading all of this and you are still confused, I offer private one hour zoom sharpening lessons to get you on the road to sharpness. In it, I will cover the principles of sharpening freehand, evaluate your knives, demonstrate the technique of freehand sharpening for the specific blade shapes you have, analyze your sharpening system, and help you refine your own technique. Learning to read scratch marks in the steel is a key component. This will establish a solid foundation for further development. Or you can send your knife back to me for a regrinding and hand sharpening.
But sharpening really is something you should learn how to do.
Note: Most of the information above has been previously published elsewhere on this blog.
Stay sharp! May your covers be dead smooth, your headcaps be crisp, your turn-ins even, your corners neat, and your leather never tear!