Review of the Delrin Folder by Benjamin Elbel

I’ve been following the career of Ben Elbel for a while.  Originally his onion skin binding structure caught my eye. It has a cleverly elegant design, and is one of the few genuinely new binding structures I have seen in the past 25 years. I met him in Amsterdam earlier this summer, and he was kind enough to write up a review of my large Delrin folder in his current newsletter, which is well worth subscribing to. 

Screen Shot 2016-08-21 at 4.16.15 PM
Benjamin Elbel

Benjamin (French nationality, 1983) fell in love with bookbinding while studying art in Strasbourg, France. From the beginning his interest has been towards the experimental side of the craft; however, determined to learn the ‘proper’ ways he embarked on a journey that took him to Switzerland (Ascona- Centro del bel libro), Germany (Göttingen- die Buchmanufaktur) and England (London- Shepherds Bookbinders, Book Works). After these years of working in the trade he started his own bindery, Elbel Libro Bookbinding in Amsterdam providing bespoke bookbinding services. Ben is known for his research in bookbinding and over the years has developed a number of innovative book and album structures such as the onion skin binding, which he shares via workshops and printed tutorials.

THE DELRIN FOLDER by Benjamin Elbel

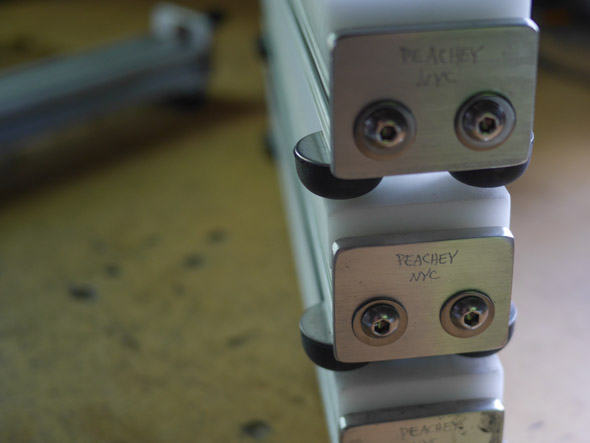
In May, Jeff Peachey gave a workshop in the Netherlands (the workshop was organised by Herre de Vries, Natasha Herman, Wytze Fopma and Restauratoren Nederland, and took place at bindery FopmaWier). Jeff is an American bookbinder, conservator and tool maker, whose work I have long admired so when I heard he was going to be around I jumped on the occasion to invite him to the bindery.

Jeff made me a gift: a special folder that he’d made, called the ‘Delrin’ folder.

Screen Shot 2016-08-21 at 3.52.25 PM

Delrin is a plastic with a very low coefficient of friction, similar to Teflon, which means that it doesn’t leave shiny marks on materials. However, unlike teflon, it is hard.

I wasn’t sure at first, thinking ‘what do I need a new folder for?’ Also, I was suspicious about the low friction qualities. Only after a while did I start trusting it and seeing its qualities:

1. The friction really is very similar to Teflon. I now use it without fear on virtually anything, except perhaps very rough and very dark papers.

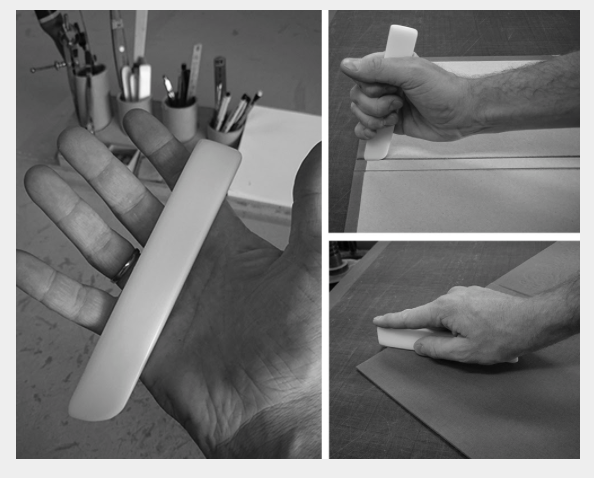
2. Its big size is really comfortable for rubbing down. If held like on the picture above, one can really cover large areas very quickly and apply a lot of pressure with less effort than with a small tool.

3. The thin tip is brilliant for rubbing material in grooves without leaving shiny marks and again, the large size means it can be held like a knife and used with maximum pressure.

As one can see on the pictures I have already used it a lot but it shouldn’t be a problem to re-grind it to refine the tip. Thanks a lot, Jeff, for introducing this new tool!

Republished from Elbel Libro Bookbinding, Newsletter, Summer 2016.  Sign up for it here.


NEW! For Sale: Sharpening System 3

There are three major improvements to this Sharpening System: Delrin plates for easy removal of used finishing film, an upgraded tightening knob, and larger feet for added stability. I’ve tested this new system for over a year for all the knives I make. Verdict? Excellent, IMHO.

ss3-3
Sharpening System 3. End view with Delrin plates.

First, and most importantly, the support plates for the microfinishing film are now made of Delrin instead of aluminum.  This makes it possible to easily peel off the worn finishing film without using solvents or a fair amount of elbow grease. It stays flat, and doesn’t dish out. The microfinishing film stays in place when in use. The Delrin plates are first machined, then hand lapped. They are 12″ long, 2″ wide, and 3/4″ thick.


ss3-2
Sharpening System 3. Detail of the precision knob.

The second upgrade is to the adjustment knob.  Previously, it was simply tapped through the end of the stand, with a coarse thread.  The new adjustment knob is made from stainless steel, has a very fine pitch, threaded through a phosphor bronze bushing. There is virtually no backlash, and nothing to rust. The end of the threaded rod contains a rounded ball, which prevents torquing of the plate while tightening. I’ll be the first to confess that this optical grade adjuster is not absolutely necessary, but, man, it is nice! Like a manual focus Leica lens.

Precise and accurate tools help perform precise and accurate work. At least, his is how I rationalize expensive tools… .

Lastly, in order to make the stand a bit more stable, the hard rubber feet are now one inch wide, with a flatter profile, giving more anti-slip contact with your bench. They can also adjust a bit to level.

This Sharpening System is a quick and convenient way to sharpen,  resharpen and keep all your knives and edge tools in peak condition, from scalpels to scimitars, plane blades to plough blades. This is a lightweight, easy to store and unbreakable system. Perfect for travel and classroom use, since there are no expensive stones to dish out, glaze over, or break.

The 3M finishing film cuts all modern high tech steels quickly and evenly. Replacement 80 micron film is available from Rio Grande; the 40, 15 and 5 micron from Tools for Working Wood.


ss3-1

The system contains everything you need: a sharpening stand, two Delrin plates, four 11 x 2″ strips each of 80, 40, 15 and 5 micron 3M PSA micro finishing film, a 12 x 2″  Genuine Horsebutt Strop, and 1 oz. bar of green chromium oxide honing compound.

SHARPENING SYSTEM 3:  $285.00      Order here

This Is Not an Ambidextrous Scissors

scissors
Boker V 88 Razor Steel Scissors

I purchased this scissors at a flea market last weekend, basically because it looked weird.

I thought it might be ambidextrous, but after playing with it a little, and doing a bit of research, I realized it is not a genuine ambidextrous scissors. But it is an interesting design.


Screen Shot 2016-07-11 at 9.41.36 AM
The 1944 patent claims this is an ambidextrous scissors. Source: https://www.google.com/patents/US2343527?dq=2343527&hl=en&sa=X&ved=0ahUKEwjeyrn9-enNAhWFKyYKHeM3DdYQ6wEIHTAA

Simply putting a thumb and finger ring on each side does not make an ambidextrous scissors. Otherwise any scissors with symmetrical ring holes would be ambidextrous. For a scissors to work properly, the top blade must be attached to the finger ring, so a scissors has to be right or left handed.  This arrangement accentuates the natural action of the hand as it closes, so the cutting edges are squeezed together. If a left hander tries to operate a right handed scissors, the natural action pulls the cutting edges apart, putting the action at a mechanical disadvantage. So a genuinely ambidextrous scissors is a mechanical impossibility, at least if it operates with thumb and finger rings.

Secondly, there is a discrepancy between the patent drawing and the actual product. The patent drawing shows the curved areas of the rings that could be used right or left handed. The actual product uses the same shape on each side, making it uncomfortable to use left handed. Would this difference invalidate the protection of the patent? Possibly this was done to save money when making the mold for casting.

scissors1
Detail, before immersion in vinegar
scissors2
Detail, after four hours in vinegar

Nevertheless, I decided to clean the scissors and sharpen them. These scissors are very comfortable and convenient to use by right handers since it doesn’t matter which way they are picked up.

After taking them apart, I immersed the scissors in white vinegar for four hours, occasionally removing surface rust with a Scotch Brite pad. I’m amazed at how well the vinegar works, and still surprised how satisfying it is to fix up a tool, returning it to useable condition. It just feels good.

If you are interested in the “proper” way to cut paper with scissors, check out this 1927 illustration from Palmer’s A Course in Bookbinding for Educational Trainning 

Miriam Schaer (see first comment) sent me this photo of a lefty scissors (note the top blade attaches to the finger rings), with even weirder placement. I can’t make sense of where you would put your fingers.

scissors3
Photo: Miriam Schaer, http://miriamschaer.com/