Twelve Ways of Testing Knife Sharpness

1. Visual inspection. When looking directly at the blade edge, with a light source behind you, are there any reflections? If so, these are dull, bent or chipped areas. The cutting edge should be an almost invisibly smooth black line.

2. Visual inspection, with magnification. When looking at the side of the blade, the smoother it is, the sharper it is, and presumably the longer the edge will last. Brent Beach, for example, measures wear in terms of pixels in a microscopic image at 200x. Leonard Lee’s Complete Guide to Sharpening has a number of electron microscope images of blade edges. Take heart, though, even a “sharp” edge will look like the Rocky Mountains if enlarged enough.

3. Shave a few hairs on your arm. If it is sharp enough to shave, it is probably pretty good. WARNING: THIS IS DANGEROUS

4. Rest the blade on a pen held at a 15 degree angle. If the blade, with just the weight of the knife catches the plastic, it is sharp. If it slides off, it is dull. The closer to parallel the pen and the knife are, the sharper the blade is.

5. Do this same test holding the blade and GENTLY and see if it catches on your fingernail.  WARNING: THIS IS DANGEROUS.

6. Tsujigiri. This test likely seems a myth. Supposedly, at one time, samurais tested their swords by the number of torsos they could cut through in one stroke. The sharpest one was a #5. WARNING: THIS IS DANGEROUS, IMMORAL AND ILLEGAL.

7. For kitchen knives, see if they can penetrate a tomato or onion, with no downward pressure and no sawing. There are many variables in the toughness of the skin of a tomato though, I imagine.

8. Longer blades can be tested by slicing paper, even toilet paper. There are many youtube videos of this. Slicing cardboard, because of its consistent and abrasive nature, is often a field test of edge durability.

9. Feel the edge ACROSS THE BLADE with your finger, applying virtually no pressure. The smoother it feels the sharper it is. You should be able to feel any slight irregularities, indicating  a dull area. WARNING: THIS IS DANGEROUS.

10. Test it on a difficult to cut substrate like styrofoam, cork, or balsa wood.

11. Send the knife to CATRA. They will qualitatively test for initial cutting performance, edge durability, and edge geometry. This will, however, dull your knife, so it is designed for production samples.

12. Possibly the best test is just to use it. Providing you are familiar with the material you are using it on, you can often tell instantly if it is sharp depending on how much force you have to apply.
NEW! For Sale: Sharpening System 3

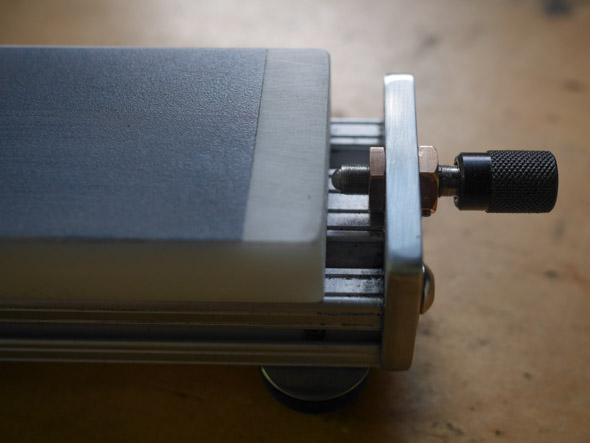
There are three major improvements to this Sharpening System: Delrin plates for easy removal of used finishing film, an upgraded tightening knob, and larger feet for added stability. I’ve tested this new system for over a year for all the knives I make. Verdict? Excellent, IMHO.

ss3-3
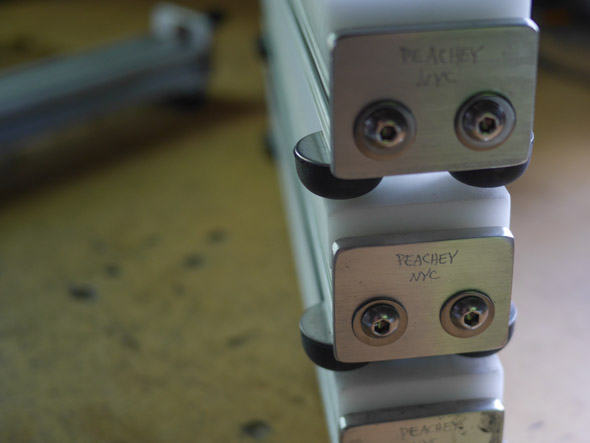
Sharpening System 3. End view with Delrin plates.

First, and most importantly, the support plates for the microfinishing film are now made of Delrin instead of aluminum.  This makes it possible to easily peel off the worn finishing film without using solvents or a fair amount of elbow grease. It stays flat, and doesn’t dish out. The microfinishing film stays in place when in use. The Delrin plates are first machined, then hand lapped. They are 12″ long, 2″ wide, and 3/4″ thick.


ss3-2
Sharpening System 3. Detail of the precision knob.

The second upgrade is to the adjustment knob.  Previously, it was simply tapped through the end of the stand, with a coarse thread.  The new adjustment knob is made from stainless steel, has a very fine pitch, threaded through a phosphor bronze bushing. There is virtually no backlash, and nothing to rust. The end of the threaded rod contains a rounded ball, which prevents torquing of the plate while tightening. I’ll be the first to confess that this optical grade adjuster is not absolutely necessary, but, man, it is nice! Like a manual focus Leica lens.

Precise and accurate tools help perform precise and accurate work. At least, his is how I rationalize expensive tools… .

Lastly, in order to make the stand a bit more stable, the hard rubber feet are now one inch wide, with a flatter profile, giving more anti-slip contact with your bench. They can also adjust a bit to level.

This Sharpening System is a quick and convenient way to sharpen,  resharpen and keep all your knives and edge tools in peak condition, from scalpels to scimitars, plane blades to plough blades. This is a lightweight, easy to store and unbreakable system. Perfect for travel and classroom use, since there are no expensive stones to dish out, glaze over, or break.

The 3M finishing film cuts all modern high tech steels quickly and evenly. Replacement 80 micron film is available from Rio Grande; the 40, 15 and 5 micron from Tools for Working Wood.


ss3-1

The system contains everything you need: a sharpening stand, two Delrin plates, four 11 x 2″ strips each of 80, 40, 15 and 5 micron 3M PSA micro finishing film, a 12 x 2″  Genuine Horsebutt Strop, and 1 oz. bar of green chromium oxide honing compound.

SHARPENING SYSTEM 3:  $285.00      Order here

The Scratches Don’t Lie and The Big Board: Impressions from Teaching in the Netherlands.

Earlier this summer, I spent a couple of throughly enjoyable weeks in the Netherlands, teaching two workshops through the auspices of Restauratoren Nederland, at the beautiful bindery of Wytze Fopma in Friesland. First there was a 3-day sharpening/ spokeshave modification class, a wadlopen and tour of Mennonite sites, then a 5-day 18th c. French binding class. It was all very, very good.

Each time I teach, I keep adding current research. I’ve taught versions of the sharpening class over thirty times, and the French at least a dozen. It sounds cliche, but I do learn something new each time.

This class, Constant Lem, book conservator at Koninklijke Bibliotheek, convinced me of the importance of the 180 degree shoulder that the French bindings often have.  I’d considered and worked on this, however working together we made progress on this historically unique(?) structural feature.

photo-35
The steel folder, which Ben Elbel calls “score!”.

Before the workshop, I visited Ben Elbel, of Elbel Libro, in Amsterdam. He has a large studio, is doing some very nice work, and has a board beveling machine that I plan to steal at some point. Ben gave me a nifty steel folder which he sells. It is a nice size for detailed work, fitting comfortably in the hand, well made, and is also useful for blind lines. It comes in an attractive die cut storage folder. Metal folders keep popping up every now and then in the history of bookbinding: the earliest I’ve seen was patented in 1889.

Below are images from the workshop.

weir7
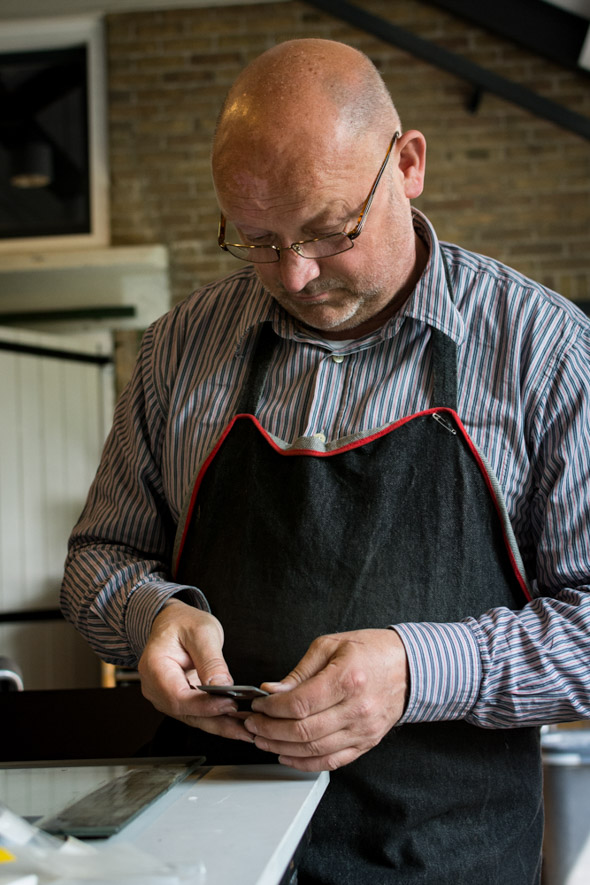
Examining a spokeshave blade while sharpening.  Photo copyright Anke van der Schaaf, 2015. All rights reserved. http://www.fopmawier.nl

One of the most important aspects in freehand sharpening involves looking at reflections and scratch patterns in the blade, in order to understand what you are doing and what needs to be done. The visual feedback lets you know how to alter your hand pressure or technique. The scratches don’t lie.


weir2
Tallying up The Big Board.  Photo copyright Anke van der Schaaf, 2015. All rights reserved. http://www.fopmawier.nl

The Big Board is a learning tool I use in the French class to keep track of questions, deviations from historic practice, instructor mistakes, material differences, etc.  Whoever has the most observations wins a prize, in this case a small lifting knife. Often there are over 150 observations. This helps keep us aware of inaccuracies generalized from our modern craft training that can creep into the historic style we are trying to understand.

As invasive treatments continue to become more infrequent in book conservation, the type of knowledge gained from making historic models will help keep book conservators relevant (I hope!), by increasing our knowledge of how these books were originally made.  Conservation as interpretation?


weir4
Beating a textblock before sewing. Photo copyright Anke van der Schaaf, 2015. All rights reserved. http://www.fopmawier.nl

Not only did we have a custom made beating hammer, but we borrowed an anvil from the Blacksmith. A wonderfully solid substitute for a beating stone!


weir5
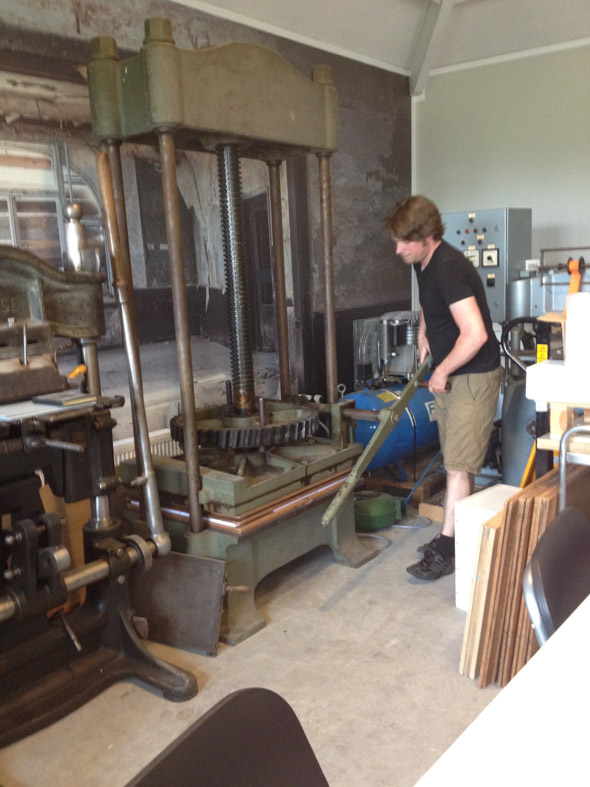
Wytze’s large standing press. He said it took nine people to tilt it back upright after it was brought in through the door. A huge blocking press is on the left.  Come to think of it, EVERYTHING in the bindery was super heavy duty. My photo.

Wytze has the most massive operational standing press I’ve ever seen. He mentioned that it is the largest in Holland. He is operating the worm drive. Once the center screw is tightened as much as possible, to generate even more pressure, the drive can crank the main press screw another turn or so. The drive can be easily disengaged to quickly raise or lower the press. As a demonstration, he pressed some of our textblock paper so hard it sunk into the MDF pressing boards, creating a clamshell. It had little to do with the class, but was too impressive not to mention.


DSC00341
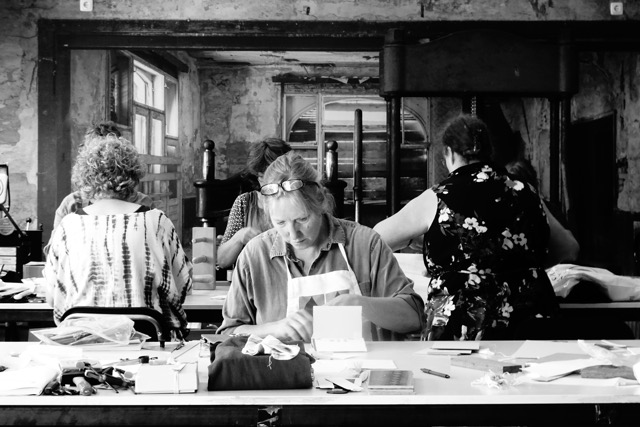
Some of the class at work. Photo copyright Natasha Herman. http://www.redbonebindery.com


weir1
The finished books. Photo copyright Anke van der Schaaf, 2015. All rights reserved. http://www.fopmawier.nl

On the left is an 18th century skull the Wytze found, the finished books, an 18th century (?) French (Dutch?) beating hammer on the right, and in the back, the printed handouts for the workshop bound en-broche by Wytze and Herre. We started with the same tan calfskin; the color variations on the finished books resulted from varying applications of glair, paste wash, and warm burnishing. These are powerful and inert ways to control the color and surface sheen of leather without dyeing.

The skull and beating hammer literally and symbolically bookend this workshop: we were working with the head and the hand, using theory and praxis, to learn more about the nature of 18th c. French binding.